
Hey guys, sorry I've been sorta M.I.A. for the past week or so, but life got pretty hectic and insane, what with finishing up the year and all that. I did manage to make some cookies, but I don't even know if I should share them with you because they came out pretty...horrendous. Thing is, I had made them before, and they were quite tasty the first time, but they sure didn't come out the right way this time around. Anyways, here goes....
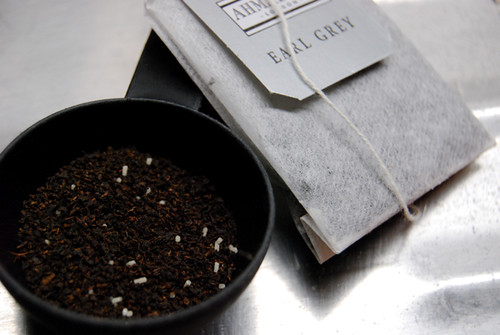
So, I'm a pretty huge Earl Grey Tea fan, and I've tried a bunch of varieties of it, both loose and packaged. I really hate the Stash brand of Earl Grey because, to me, it's way way too fruity and doesn't taste like Earl Grey at all. Trader Joe's makes a pretty good packaged tea, but my favorite brand that can be found in (some) supermarkets, would be Ahmad Tea. Their Earl Grey is pretty spot on, in my opinion, but I can only find it at SuperKing (a super market up in Altadena). But if you get a chance to try it, do.
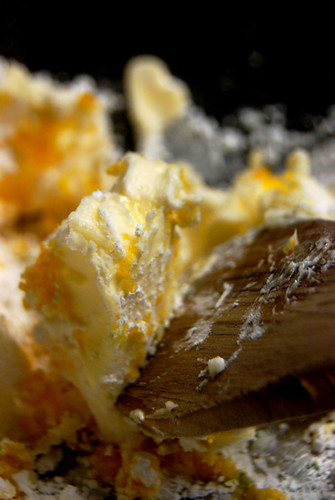
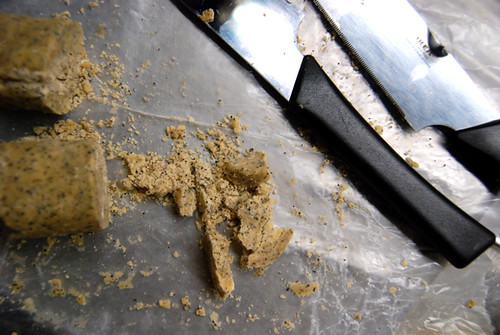
I think where I began to go wrong was with the butter situation. I forgot to let the butter get to room temperature, so it didn't mix evenly into the dough, leaving me with chunks of pure butter that just wouldn't incorporate into the rest. Big problem. This recipe has you form the dough into a log-like shape and freeze it, and then slice the cookies Pillsbury-style. I followed the instructions and used a ruler to help shape the log, which actually wasn't as difficult as it sounded. Unfortunately, I didn't have a spare empty paper towel tube to put the dough inside of, so I just stuck it in the freezer without. This might have also led to the cookie's sad end results.

But the main reason (I think) that these cookies failed so pathetically was because the dough wasn't completely mixed homogeneously, causing the dough to crack and crumble and absolutely refused to keep its shape when sliced. A complete failure. I was sad.
But the main reason (I think) that these cookies failed so pathetically was because the dough wasn't completely mixed homogeneously, causing the dough to crack and crumble and absolutely refused to keep its shape when sliced. A complete failure. I was sad.
Yeah, I'd say that's pretty laughable. Boo-hoo! I tried to mush the dough into little discs, but to no avail. The product was, well, not so nice. The most aggravating thing, though, was that I had made these over winter break and they sliced nicely, were quite pretty and elegant, and had a really nice flavor and melty texture when you bit into them. Not only did these look ugly after they were baked, they didn't even taste as good. I really don't know why the flavor was so bad, because I don't think I changed anything, but something went awry along the way!
I guess I can show you the end results, but I want to hide from embarrassment. It's quite humiliating, actually. Ok, here goes, but promise you won't taunt me too badly!
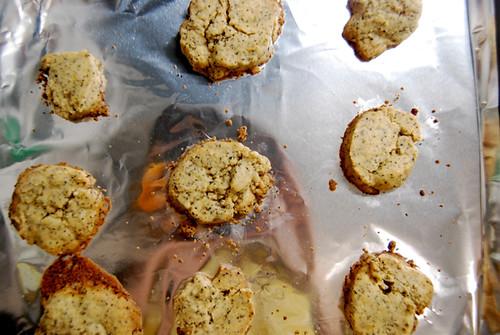
I guess I can show you the end results, but I want to hide from embarrassment. It's quite humiliating, actually. Ok, here goes, but promise you won't taunt me too badly!
HOW WAS THIS POSSIBLE. More importantly, how did I manage to forget to photograph these cookies the first time I made them, when they looked so darling and dainty?? Ugh! Well, I still encourage you to try these, because based on the first time I made them, they are really pretty, what with their speckles of tea and golden edges, and they taste delicious (not too sweet, just perfect for an afternoon tea).
Anyways, I'm making a new recipe as I write this entry, and my oven timer just beeped. Stay tuned--these next ones should be good (or at least a lot better than these!)
Earl Grey Tea Cookies
Makes about 8 dozen
Ingredients
{End Results} --- I'll base this on the first time I made these!
Baking Difficultly: 2.5/5
Ingredient Accessibility: 4/5
Tastiness: 3.5/5
Attractiveness: 4/5
Is it worth it?: Yeah, give it a try!
Anyways, I'm making a new recipe as I write this entry, and my oven timer just beeped. Stay tuned--these next ones should be good (or at least a lot better than these!)
Earl Grey Tea Cookies
Makes about 8 dozen
Ingredients
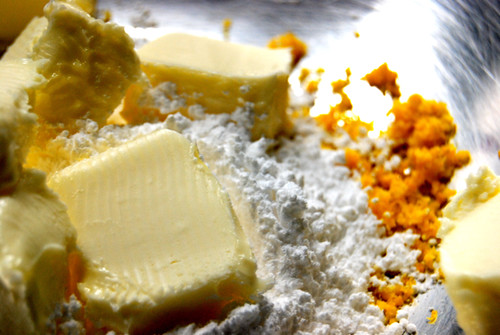
- 2 cups all-purpose flour, plus more for dusting
- 2 tablespoons finely ground Earl Grey tea leaves, (from about 8 bags)
- 1/2 teaspoon salt
- 2 (8 ounce) sticks unsalted butter, softened
- 1/2 cup confectioner's sugar
- 1 tablespoon finely grated orange zest
- Whisk together flour, tea, and salt in a small bowl; set aside.
- Put butter, sugar, and zest in the bowl of an electric mixer. Mix on medium speed until pale and fluffy, about 3 minutes. Reduce speed to low; slowly mix in flour mixture until just combined.
- Divide dough in half. Transfer each half to a piece of parchment paper; shape into logs. Roll in parchment to 1 1/4 inches in diameter, pressing a ruler along edge of parchment at each turn to narrow log and force out air. Transfer in parchment to paper-towel tubes; freeze 1 hour.
- Preheat oven to 350 degrees. Cut logs into 1/4-inch-thick slices. Space 1 inch apart on parchment-lined baking sheets.
- Bake until edges turn golden, 13 to 15 minutes. Let cool on sheets on wire racks.
{End Results} --- I'll base this on the first time I made these!
Baking Difficultly: 2.5/5
Ingredient Accessibility: 4/5
Tastiness: 3.5/5
Attractiveness: 4/5
Is it worth it?: Yeah, give it a try!
6 comments:
Hey - I think I have pictures of your first batch from when you were home in the spring.
sorry you had trouble with the dough, they look great, though!
Thanks Justine!
the picture of the butter and flower and spoon with the black background is AMAZING
might i just say the first batch way beyond divine <3
some of my personal favs o yours :)
http://i108.photobucket.com/albums/n18/maryp64/Baking/24529_1298887720431_1477530114_3079.jpg
these cookies were tough but you should def give them another go! my attempt at them above
Post a Comment