Saturday, March 28, 2009

[Cookie 007] Snickerdoodles

Snickerdoodles

Well good news: I got my A-game back!! I didn't fail with this recipe! But let's get to it....

So, Snickerdoodles--a classic right? Truth be told, before this batch of Snickerdoodles, I wasn't much of a fan. I hadn't had a Snickerdoodle in years, and etched in my memory was some sort of crackly, blackened and burnt cookie that didn't have much flavor or intrigue. No chocolate?! Not fruity either?! Where's all the gooeyness/nuttiness/powdered sugar/general craziness?? But, it was my friend Thea's birthday last week, so of course it was her turn to choose this week's cookie recipe. She actually just wanted any soft and chewy cookie, but we all know that she likes sugar more than a hyperactive 7 year old on Halloween, so it came down to either Martha's Sugar Cookies or Snickerdoodles, and I had only ingredients for the latter.

Snickerdoodles, not burnt!

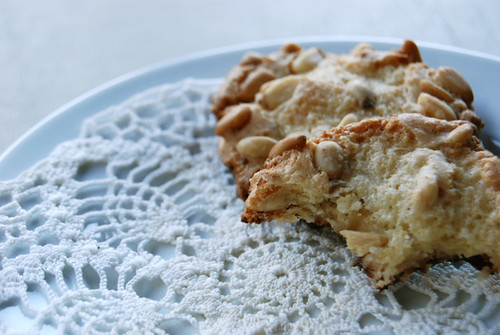
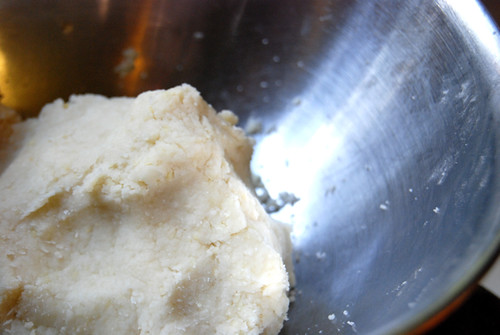
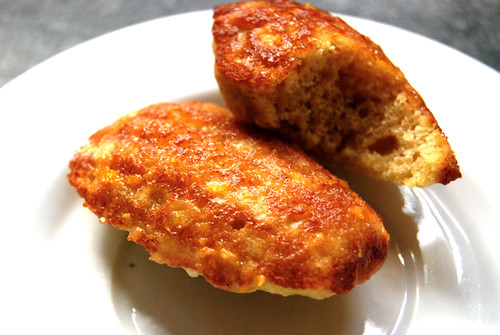
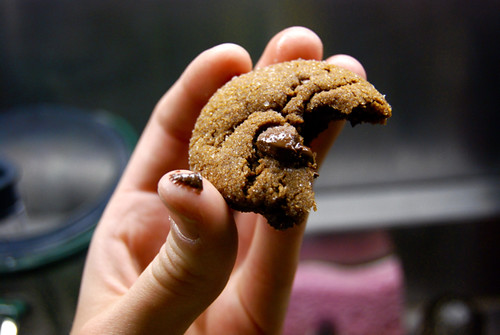
So I got to baking. The recipe, obviously, is one of the easiest and fastest cookie recipes you can come across (unless all you have is 1 frozen stick of butter that refuses to thaw--my situation). But I managed to turn out two lovely batches, none of which were at all burnt! Not even the bottoms, which were perfectly golden! And let me just say, these cookies were so soft, too.

Various Stages of the Great Snickerdoodle Transport
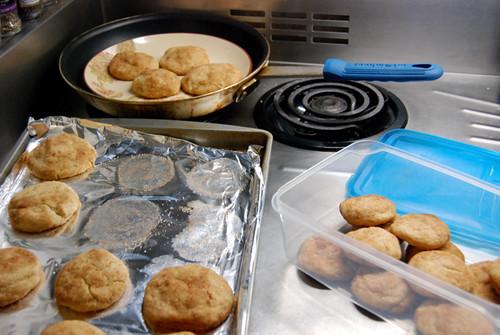
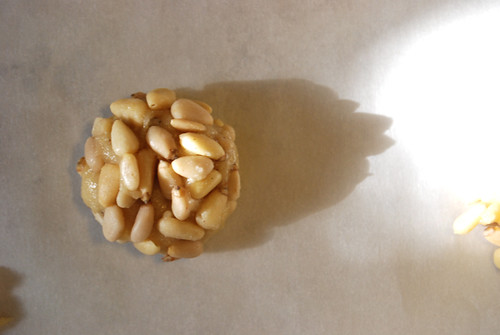
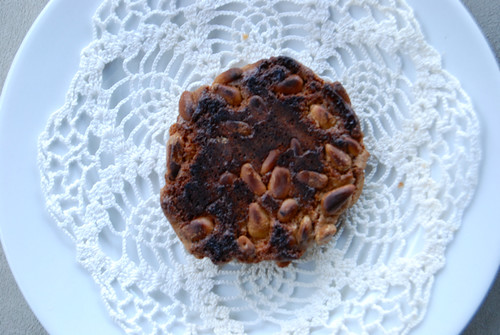
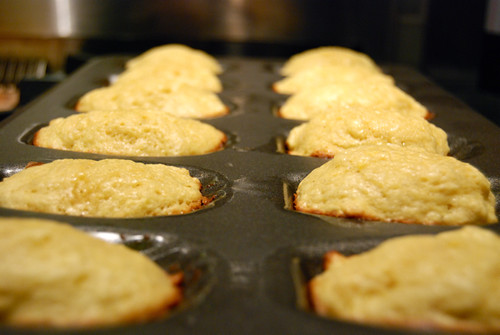
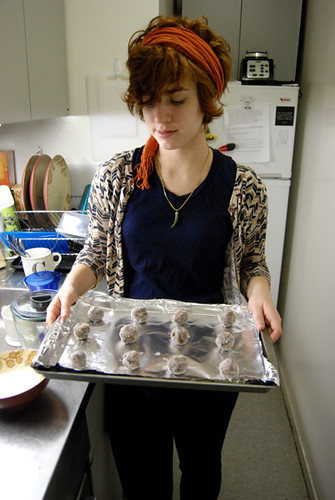
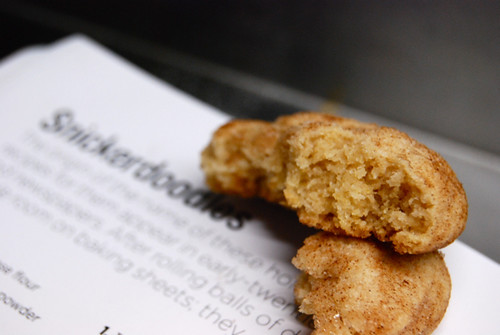
Cookies, in various stages of baking and transportation to the birthday girl

But what say my favorite critics? The crew I feed my weekly cookies to every week (so I can fatten them up and eat them later)? My friends' responses were only of the highest praise; these are really the epitome of Snickerdoodles. Now I understand why these cookies have become such a classic: a super easy recipe that yields great results! Simply tasty, really easy and fun to make, and you most likely have all the ingredients already floating around your pantry. Perfect for a last-minute gift to bring to a party, or to make with kids/friends/enemies/the elderly/yourself.

Snickerdoodles

Snickerdoodles
Makes 1 1/2 dozen
  • 2 3/4 cups all-purpose flour
  • 2 teaspoons baking powder
  • 1/2 teaspoon coarse salt
  • 1 cup (2 sticks) unsalted butter, room temperature
  • 1 1/2 cups sugar, plus 2 tablespoons (divided)
  • 2 large eggs
  • 2 teaspoons ground cinnamon
Directions
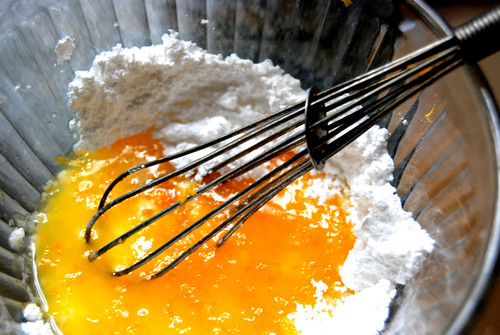
  1. Preheat the oven to 350 degrees. Sift together flour, baking powder, and salt into a bowl. Put butter and 1 1/2 cups sugar in the bowl of an electric mixer fitted with the paddle attachment. Mix on medium speed until pale and fluffy, about 3 minutes. Mix in eggs. Reduce speed to low; gradually mix in flour mixture.
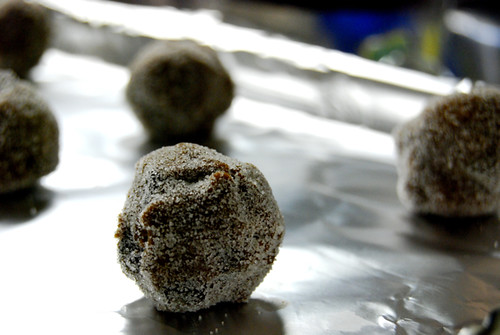
  2. Stir together cinnamon and remaining 2 tablespoons sugar in a small bowl. Shape dough into twenty 1 3/4-inch balls; roll in cinnamon sugar. Space 3 inches apart on baking sheets lined with parchment paper.
  3. Bake cookies, rotating sheets halfway through, until edges are golden, 12 to 15 minutes. Let cool on sheets on wire racks. Cookies can be stored between layers of parchment in airtight containers at room temperature up to 3 days (but you'll devour them in under 3 hours).
****

{End Results}
Baking Difficultly: 1/5
Ingredient Accessibility: 5/5
Tastiness: 3.5/5 (I still think that, flavor-wise, they are a little boring--but the texture makes up for it)
Attractiveness: 3/5 (Nothing that great to look at--not ugly, but not pretty)
Is it worth it?: Definitely. You want to make an easy recipe with ingredients that you probably already have lying around? This is it!

Friday, March 20, 2009

[Cookie 006] Pine Nut Cookies

Pine Nut Cookies

Okay, if I were to have had a baking license, it would surely (and justly) have been revoked after this latest batch of "cookies." I don't know what I was thinking with these Pine Nut Cookies--maybe it was the hot California sun melting my brain or something, but I thought it would be acceptable to try and substitute powdered sugar with home-made powdered sugar. Now, normally this should work, because all you have to do is put 1 cup of granulated sugar with 1 tbsp of corn starch into a blender, but me being the genius that I am, put them in the food processor, which completely FAILED. I ended up with granulated sugar and cornstarch, not powdered sugar. So obviously, this made a huge difference in the texture of the cookies, and essentially ruined them.

Homemade Almond Paste

So I substituted real powdered sugar because I didn't have enough at home, but I also didn't have any almond paste, so I made some of my own of that as well. Fortunately, this was pretty easy and worked out great. But now I have a bunch left over and I don't know what to do with it...

Additionally, even though I divided the recipe by 3, I ran out of pine nuts as well! Yeah, only the key ingredient, the one that lends itself to the title of the cookie! Ugh! I really shouldn't have tried this recipe until I actually had the stuff I needed, but for some reason I stuck with it. And it showed in the results.

Successful Cropping

I ended up with a grand total of ONE nice looking pre-baked cookie. There it is, up there. Right there. That's it. Yeah. The rest? Well, suffice it to say that I didn't see the point in photographing them. Some didn't even have any pine nuts on the outside. Yeah, that bad.

So how did they turn out post-baking? Well, they were overdone, burnt, and lousy. And it's all my fault! Oh woe! Won't someone else please try this recipe and do it justice? Because the batter is delicious and I honestly think that they would be great cookies if done correctly. Because, honestly, who wants to eat this:

Failed

Yeah, I don't know. Not me.

Pine Nut Cookies
Makes about 3 dozen

Ingredients
  • 2 cups pine nuts
  • 1 cup confectioners' sugar
  • 1/4 cup almond paste
  • 1 teaspoon pure vanilla extract
  • 1 large egg
  • 1/2 cup all-purpose flour
  • 1/4 teaspoon baking powder
  • 1/4 teaspoon salt
Directions
  1. Preheat oven to 350 degrees. Process 3/4 cup pine nuts, the sugar, almond paste, and vanilla in a food processor until fine crumbs form. Add egg; pulse to combine. Add flour, baking powder, and salt; process just until dough comes together.
  2. Roll dough into 3/4-inch balls. Roll balls in remaining 11/4 cups pine nuts, gently pressing to coat. Space 2 inches apart on parchment-lined baking sheets.
  3. Bake until cookies begin to turn golden brown, about 20 minutes. Let cool completely on sheets on wire racks.
****

{End Results}
Baking Difficultly: 1/5
Ingredient Accessibility: 3/5
Tastiness: ?/5 (I bet they would be good if I baked them better)
Attractiveness: 4/5 (They are very cute and easy to make look nice if you don't burn them like I did)
Is it worth it?: Some one else please try these out and tell me if they are as tasty as I think they should be!


Tuesday, March 17, 2009

[Cookie 005] Orange Cardamom Madeleines

Orange Cardamom Madeleines

Well, well, well. Look what happened. A recipe that wasn't totally delicious and pretty and perfect. To be fair, I don't know who screwed up--Martha or myself--but someone did, and it might have been both of us in fact.

Madeleine Tray

I decided to make this recipe primarily because of the location of the kitchen I would be cooking in; I'm back in California on spring break, which means two things: 1) sunny, warm weather! 2) better cooking tools! I don't own a madeleine pan (or Viking stove or Cardamom) in New York, so I figured what better recipe to make at home than this one! Everything was going smoothly, except for me nearly forgetting to add the butter mixture to the dough before chilling it, but other than that, I think my dad and I followed the recipe rather diligently.

Orange-Cardamom Madeleine Glaze

The issue arose when making the orange glaze for the cookies. My dad juiced an orange, but I failed to measure the proper amount in relation to the powered sugar, and I just added all the juice. So, you'd think, "No biggie! Just add more powdered sugar!" So I did, but I didn't add enough, and the glaze wasn't so much a glaze than a juice that the cookies rapidly absorbed. So that was my fault.

But the cookies themselves weren't that great either, to be honest. They were a little too dense for my liking, especially since madeleines are supposed to be light and airy. They soaked up the glaze, which made them a little less dry, but it wasn't right. Also, they were didn't bake up very nicely. The dough was lumpy and didn't fill out the whole madeleine dish. Boo!! Oh well, they were tasty, of course, but they didn't really live up to my expectations.

Ugly Orange-Cardamom Madeleines

Orange Cardamom Madeleines

Ingredients:
  • 1/4 cup (1/2 stick) unsalted butter, plus more for pan
  • 1 tablespoon good-quality honey
  • 1 teaspoon pure vanilla extract
  • 3/4 cup all-purpose flour
  • 1 teaspoon baking powder
  • 3/4 teaspoon ground cardamom
  • 1/4 teaspoon salt
  • 1/4 cup granulated sugar
  • 2 large eggs
  • 3/4 cup confectioners' sugar
  • 1 teaspoon finely grated orange zest, plus 2 tablespoons strained orange juice
Directions
  1. Brush molds of a madeleine pan with butter; set aside. Make the batter: Melt butter in a small saucepan over low heat. Remove from heat, and stir in honey and vanilla. Let cool 10 minutes.
  2. Whisk flour, baking powder, cardamom, and salt in a small bowl; set aside.
  3. Preheat oven to 325, with rack in center. Stir together sugar and eggs in a medium bowl. Gently fold in flour mixture until combined. Add butter mixture, and fold until combined. Cover with plastic wrap, and refrigerate 30 minutes.
  4. Spoon batter into prepared pan, filling each mold halfway. Tap pan on work surface to eliminate air bubbles. Bake until cookies are puffed and edges are golden, 7 to 8 minutes. Transfer pan to a wire rack; let cool slightly. Unmold cookies onto rack, and let cool completely.
  5. Make the orange glaze: Stir together sugar and orange zest and juice in a small bowl until glaze is smooth, thick, and opaque. Using a small pastry brush, coat ridged side of each cookie with glaze. Let set 15 minutes. Cookies can be stored in a single layer in an airtight container up to 3 days.
****

{End Results}
Baking Difficultly: 2/5
Ingredient Accessibility: 3/5
Tastiness:3/5
Attractiveness: 2/5
Is it worth it?: In all honestly, probably not. But maybe if the glaze is done right...

Monday, March 9, 2009

[Cookie 004] Double Chocolate Brownies

Double Chocolate Brownies

Brownies are a funny thing. I feel that everyone has their favorite recipe, which has been passed down in the family, and is generally undisputed and adored unconditionally. I didn't necessarily have that, but for my entire life my family used only 1 recipe (when we weren't making brownies from a mix...which we *ahem* usually didn't do anyway, though, so don't judge). Yes, when my dad would make his brownies they would always come out pretty wicked, especially when he used Droste or Scharfenberger cocoa. That's where it's at, of course.

Emily, Eating Brownie

Anyways, I digress. Because the point of this whole entry is that I did not use this same family recipe. I tried Martha's Double Chocolate Brownie ones of course! And, all though I will always be devoted to my dad's brownies (and pancakes, and my mom's apple pie), this recipe was pretty delicious. Really really delicious actually. You see, I tend to like most of my baked goods a little on the undercooked, soft, and chewy side, and these brownies were just that. They were super fudgy and not dry in the slightest.

All Cut Up

The only problem was my impatient friends. Remember them? The ones that can't wait more than 2 minutes after I remove something from the oven to devour it whole? Yeah, those guys. Oh, friends. Here's the deal: you are supposed to let the brownies set for a few minutes, so you can cut them and make nicely square brownies. Yeah, I know, I shouldn't be a stickler for the rules, and I love a hot brownie as much as the next person, but I like nice presentation too. But in the end, it never matters; it all ends up the same place anyway, right?

Double Chocolate Brownies
Ingredients
  • 6 tablespoons unsalted butter, plus more for pan
  • 6 ounces coarsely chopped good-quality semisweet chocolate
  • 1/4 cup unsweetened cocoa powder (not Dutch-process)
  • 3/4 cup all-purpose flour
  • 1/4 teaspoon baking powder
  • 1/4 teaspoon salt
  • 1 cup sugar
  • 2 large eggs
  • 2 teaspoons pure vanilla extract
Directions
  1. Preheat oven to 350 degrees. Line a buttered 8-inch square baking pan with foil or parchment paper, allowing 2 inches to hang over sides. Butter lining (excluding overhang); set pan aside.
  2. Put butter, chocolate, and cocoa in a heatproof medium bowl set over a pan of simmering water; stir until butter and chocolate are melted. Let cool slightly.
  3. Whisk together flour, baking powder, and salt in a separate bowl; set aside.
  4. Put sugar, eggs, and vanilla in the bowl of an electric mixer fitted with the whisk attachment, and beat on medium speed until pale, about 4 minutes. Add chocolate mixture; beat until combined. Add flour mixture; beat, scraping down sides of bowl, until well incorporated.
  5. Pour batter into prepared pan; smooth top with a rubber spatula. Bake until a cake tester inserted into brownies (avoid center and edges) comes out with a few crumbs but is not wet, about 35 minutes. Let cool slightly in pan, about 15 minutes. Lift out brownies; let cool completely on a wire rack before cutting into squares.
****

{End Results}
Baking Difficultly: 1/5
Ingredient Accessibility: 4/5
Tastiness: 5/5
Attractiveness: 3/5 (how attractive can brownies be, actually?)
Is it worth it?: Looking for a new brownie recipe? This is it!

Sunday, March 1, 2009

[Cookie 003] Chewy Chocolate Gingerbread Cookies

Chewy Chocolate Ginger Cookies

Hi.

So, basically, here's the deal. These cookies rocked. Severely. I know they are only the 3rd cookie I have blogged about, but so far they earn the coveted 1st place blue ribbon in my heart. But don't take my word for it, some of my (highly respected) friends coined these cookies as "magical" and begged me to make them again, essentially urging me to abandon my task of only baking each cookie once (part of my effort towards making every cookie from this book). Yeah. That good.

Looks Bad

Granted, you do have to work for it. There is a lot of waiting around in this recipe: lots of chilling and rechilling, which can lead to impatient guests who take their crankiness out on you for inviting them over and not actually supplying any cookies. What can I say, I didn't really read the recipe in advance, so my friends only got bits of cookie dough to munch on and had to come back the following day (after the dough had chilled) in order to get the highly anticipated cookies. But it was worth it, they say. I have to agree.

Chocolate Ginger Cookies, Ready

One of the best parts of this recipe was having to roll the balls of uncooked dough in granulated sugar before baking. This gives the cookie an AMAZING texture once baked: crystalized outsides, crunchy edges, and soft, chewy, delicious insides. One bite, and you'll get what I mean. And although it is extremely tempting to eat a cookie as soon as the tray comes out of the oven (and you should), I recommend saving a few to eat after they have cooled and set a bit. The chewiness really gets better after they have had time to harden up a bit.

Emily is Ready

Next time I want to use much higher quality cocoa, and I actually didn't put any freshly grated ginger in these (yeah I know, I suck), but they still tasted gingery and delicious.

Chewy Chocolate Gingerbread Cookies
Makes 2 dozen

Ingredients
  • 7 ounces best-quality semisweet chocolate
  • 1 1/2 cups plus 1 tablespoon all-purpose flour
  • 1 1/4 teaspoons ground ginger
  • 1/4 teaspoon ground cloves
  • 1/4 teaspoon ground nutmeg
  • 1 tablespoon cocoa powder
  • 1/2 cup (1 stick) unsalted butter
  • 1 tablespoon freshly grated ginger
  • 1/2 cup dark-brown sugar, packed
  • 1/2 cup unsulfured molasses
  • 1 teaspoon baking soda
  • 1/4 cup granulated sugar
  • 1 teaspoon ground cinnamon
Directions
  1. Chop chocolate into 1/4-inch chunks; set aside. In a medium bowl, sift together flour, ground ginger, cinnamon, cloves, nutmeg, and cocoa.
  2. In the bowl of an electric mixer, fitted with the paddle attachment, beat butter and grated ginger until whitened, about 4 minutes. Add brown sugar; beat until combined. Add molasses; beat until combined.
  3. In a small bowl, dissolve baking soda in 1 1/2 teaspoons boiling water. Beat half of flour mixture into butter mixture. Beat in baking-soda mixture, then remaining half of flour mixture. Mix in chocolate; turn out onto a piece of plastic wrap. Pat dough out to about 1 inch thick; seal with plastic wrap; refrigerate until firm, at least 2 hours.
  4. Preheat oven to 325 degrees. Line two baking sheets with parchment paper or nonstick baking mats. Roll dough into 2-inch balls; place 2 1/2 inches apart on baking sheets. Refrigerate 20 minutes. Roll dough balls in granulated sugar and return to baking sheets. Transfer to oven and bake until surfaces crack slightly, about 18 minutes. Let cool 5 minutes; transfer to a wire rack to cool completely.
****

{End Results}
Baking Difficultly: 2/5
Ingredient Accessibility: 4/5
Tastiness: 5/5
Attractiveness: 4/5
Is it worth it?: DO IT!