Monday, August 31, 2009

[Cookie 038] Grammy's Chocolate Cookies

DSC_0175.JPG

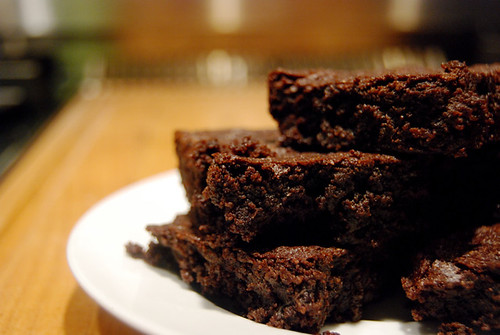
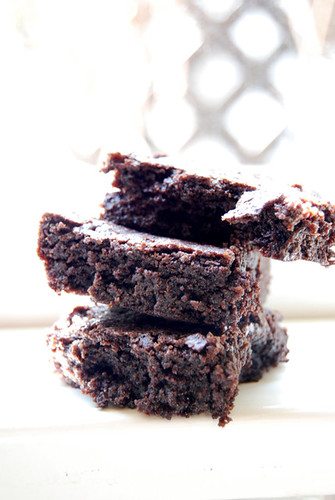
Hello, friends, let's pick up where we left off, shall we? If you remember correctly, Martha left me a little down in the dumps after her last recipe--the Chocolate-Ginger Brownies. Though several of you were not as dismayed as I was in their end result, I assure you all that these cookies here are far, far superior. A capital chocolate cookie, if there ever was one. Basic, but perfect. Grammy's Chocolate Cookies (please, hold the laughter regarding the corny name) are yet again another one of Martha's excellent, simple, traditional cookies.

DSC_0167.JPG

So, I began this recipe almost immediately after baking the previous batch of "theoretical brownies," as I shall now refer to them because in theory they should have been tasty. Anyway, the reason I baked these right afterward was because I needed to bring a little dessert to a dinner party I was attending, and I just could not bring myself to bring the brownies (trust me, you didn't taste them...they were yucky). Needless to say, I was in a little bit of a tizz and quite frustrated, and so it was only natural that I dump the huge metal canister that we keep about 10 pounds of sugar in on top of the 2 eggs that I was going to use for the next recipe. Sugar, everywhere. Eggs, everywhere. Disaster, everywhere.

DSC_0093.JPG
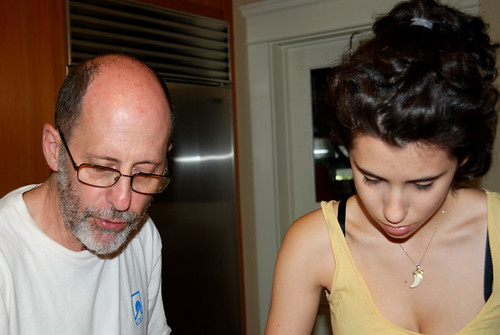
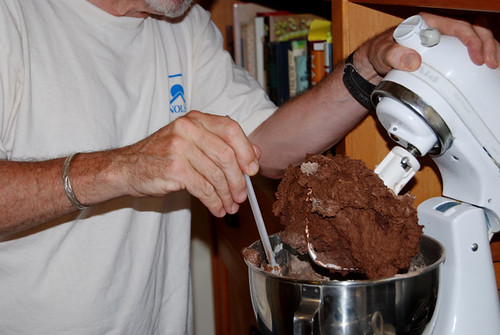
Here's a lovely picture of my dad consoling me as we clean up the huge mess. My brother was so kind to photograph me in the midst of my freak out session (sarcasm), but I don't think he really captured how pissed off I was that he was photographing my tantrum.

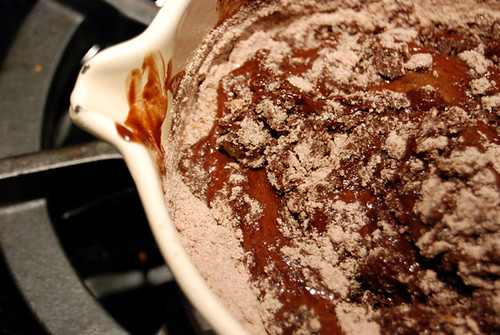
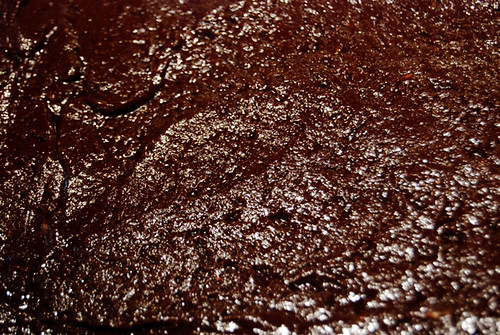
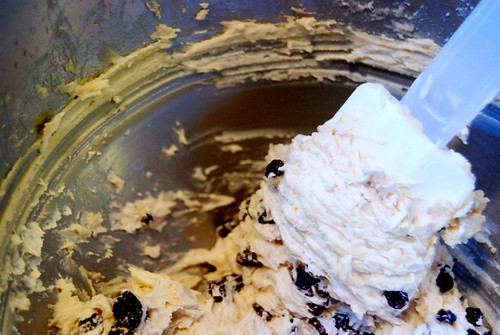
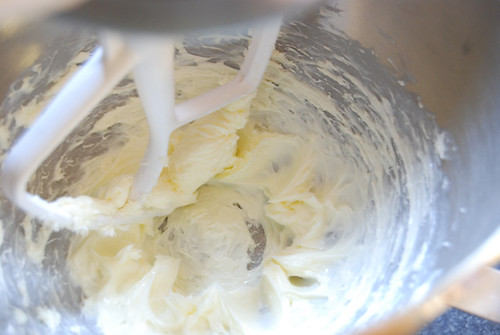
So, I bet you just loved seeing that totally irrelevant picture, right? Moving on. Fortunately, after the mess was dealt with, the recipe went off without a hitch! Creamed the butter and eggs, check. Added the chocolate, check. Ate lots of raw dough, check and check.

DSC_0110.JPG
DSC_0117.JPG

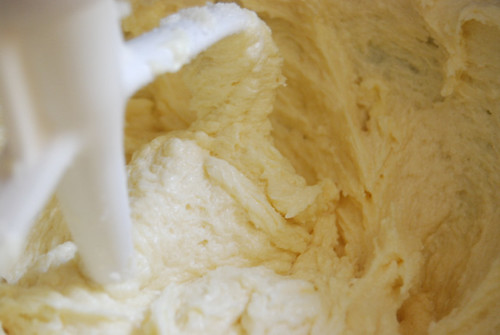
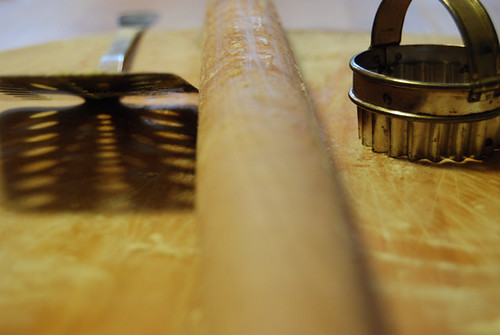
The completed dough is pretty easy to work with (as you can see in the photo, it comes together quite....easily....on the paddle of the KitchenAid). And then, you roll the dough into balls, and roll them in sanding sugar, and bake. But wait, let me introduce you to my new best friend(s) in the kitchen. COOKIE SCOOPS, OMGZ!1

DSC_0148.JPG

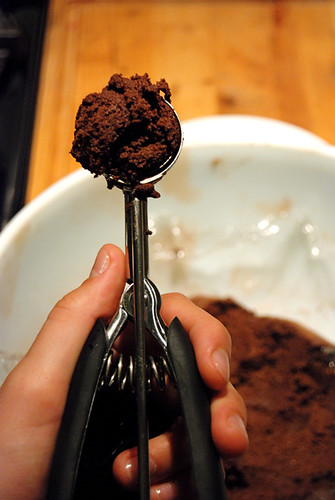
Look at that baby. Beautiful. Handy. Makes all my cookies the same size, and that's really all I want in life. Those who know me, know that I like things to be just so. Some call this little tick OCD, but I call it care and precision. Plus, it's just so easy to scoop the dough and plunk it onto the Silpat (which now has to share the title of BFF in the kitchen). No messiness of using 2 spoons to awkwardly form the dough into balls. God, I am so in love.

DSC_0185.JPG

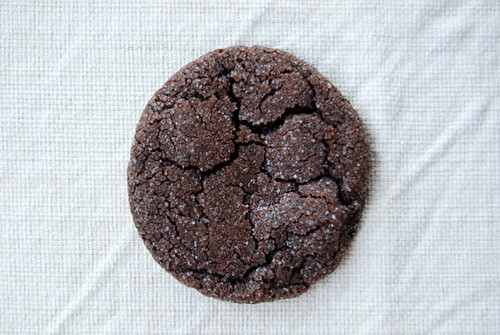
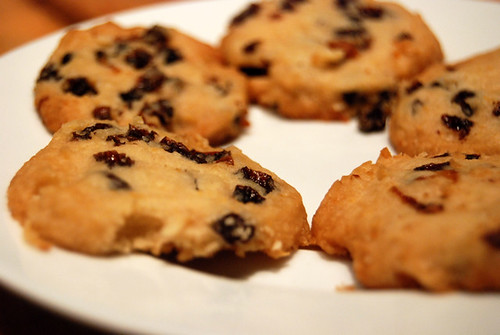
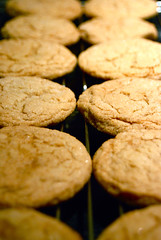
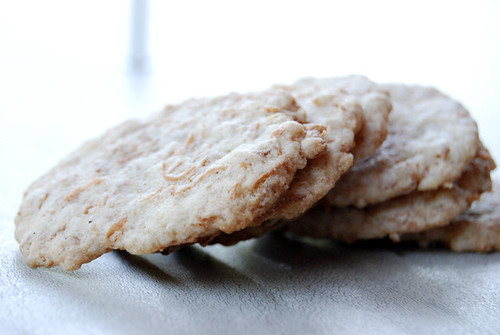
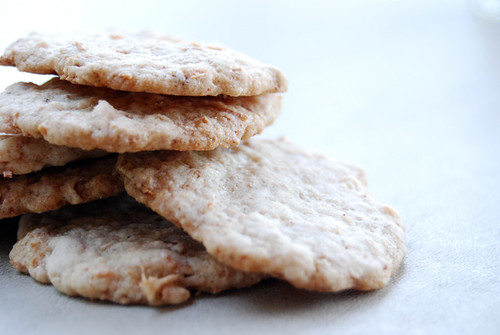
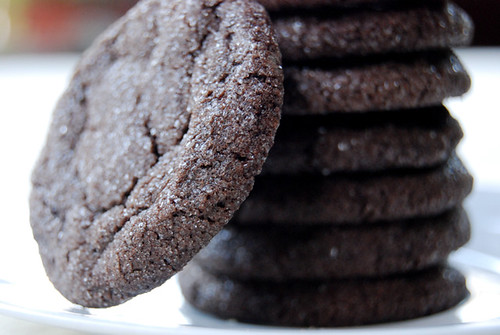
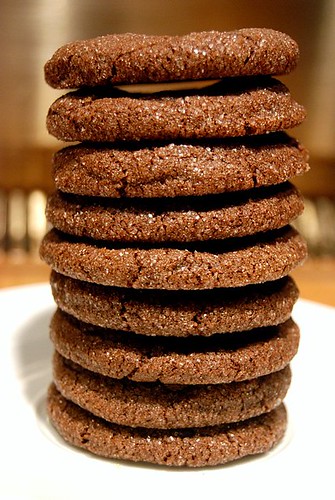
Okay, right. So we scooped the dough with the Super Scooper, which I shall call this wonder tool, and you have every right to tease the hell out of me for calling it this. End results of the cookies? Perfectly soft, chocolatey, and crispy on the outside. Plus, they were all perfect circles and looked just like the photo in the book! Success! Make this cookie!

DSC_0181.JPG

Grammy's Chocolate Cookies

Ingredients
  • 2 cups all-purpose flour
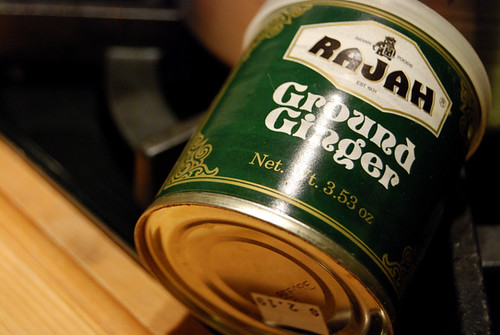
  • 3/4 cup Dutch cocoa powder
  • 1 teaspoon baking soda
  • 1/2 teaspoon salt
  • 1 1/4 cups (2 sticks plus 4 tablespoons) unsalted butter, room temperature
  • 2 cups sugar, plus more for dipping
  • 2 large eggs
  • 2 teaspoons pure vanilla extract

Directions
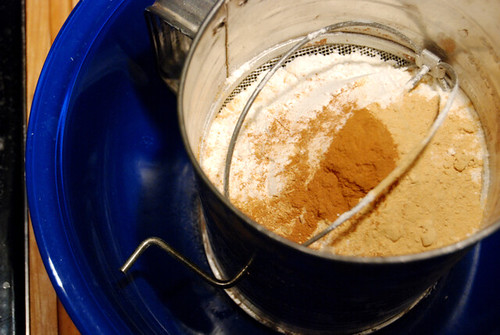
  1. Sift together flour, cocoa powder, baking soda, and salt. Set aside.
  2. In the bowl of an electric mixer fitted with the paddle attachment, beat butter, 2 cups sugar, and eggs on medium speed until light and fluffy, about 2 minutes. Add vanilla, and mix to combine. Gradually add dry ingredients, and combine with mixer on low speed. Cover bowl with plastic wrap, and chill until dough is firm, about 1 hour.
  3. Preheat the oven to 350 degrees. Line baking sheets with Silpat baking mats. Roll dough into 1-inch balls. Roll each ball into sugar. Place on prepared baking sheets about 1 1/2 inches apart. Bake until set, about 8 minutes. Cool on baking sheets for 5 minutes before transferring to a wire rack to cool completely.

****

{End Results}
Baking Difficultly: 1/5
Ingredient Accessibility: 4.5/5 (Sanding sugar being the only thing you might need to look for)
Tastiness: 4/5
Attractiveness: 4/5 (Thanks to the cookie scoop)
Is it worth it?: Yep! Easy, tasty, and everyone will like them!

{Pairings}
Drink: Milk. Duh.
Song: I Want a Little Sugar in My Bowl -- Nina Simone
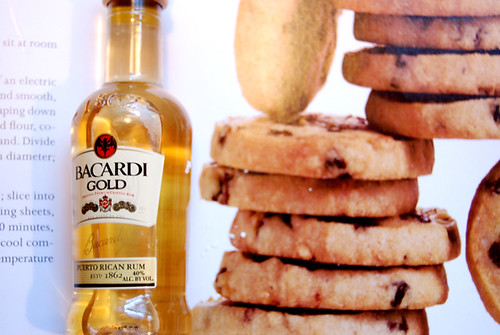
Activity: Making cookie towers with your perfectly shaped cookies!

Saturday, August 29, 2009

[Cookie 037] Chocolate-Ginger Brownies

DSC_0130.JPG

Yesterday, here in lovely Los Angeles, it was 105º F. That's 40.5º C. That's really hot. And to tack onto the scorching temperature, more wildfires have sprung up in the mountains, one of which is located in a town that's only 20 minutes away from my house! It's totally nuts! From anywhere in my town, if you looked north toward the mountains you could see this monumental plume of smoke billowing out of the canyons--it looked like a nebula in outer space it was so huge.

So yesterday evening, as the fires raged and the temperature outside was still in the 80s at 10:00 pm, I went with a friend to see Brüno (which was hilarious, seriously--I had low expectations, but it was so worth it). Anyway, afterward we decided to drive north toward the mountains just a bit so we could get a glimpse at where the fires were coming from. As we came out of a tree-lined residential street and into the open, we could literally see the flames outlining the slope of one of the hills. It looked something like this:

(Picture not my own! Credit: darylphotos' on Flickr)

So yeah, pretty scary. I hope none of you are affected by any of these fires! And if you live nearby, be safe! I could literally watching the flames advancing over the ridge of the mountain with my own eyes--fire spreads fast...like WILDFIRE!

DSC_0063.JPG

But enough about that. I'm here to bake cookies. Or in this case, Chocolate-Ginger Brownies. I hate to tell you guys, though, that this is another of her mysteriously bad, possibly unedited/unproof-read recipes though. Those who know me know that I'm a totally gingerophile, so I was totally gung-ho about the flavors in this recipe. Unfortunately, the end result was not so good.

DSC_0075.JPGDSC_0052.JPG

I'm pretty sure this recipe must have been just missing an ingredient or two, because I had made one of Martha's brownie recipes, the Double Chocolate Brownies, before and they were fantastic and simple and just a great recipe all around. These, however, did not list any sort of leavener (read: Baking Soda or Powder) in the ingredients, and therefore the brownies did not rise an inch. They were absurdly dense, chewy, and pretty gross.

DSC_0081.JPG

However, I did enjoy the idea behind this recipe. Maybe it's more of a conceptual recipe--a theoretical brownie. They have ginger, cloves, and all sorts of spices, which when combined with chocolate make a really interesting flavor combination. So I bet if you took her Double Chocolate Brownie recipe and added these spices and flavors, you would have a winner. I urge you to try it if you love ginger like I do!

DSC_0085.JPG
DSC_0089.JPG

Here's a photo of my disappointment in the end result (left, sadface) followed by a photo of the next recipe I made immediately after throwing away the theoretical brownies (right, dorkyface):

Bad Cookie Good Cookie

The next recipe is a winner. Stay tuned folks.

DSC_0116.JPG

Chocolate-Ginger Brownies
Makes 16 small brownies, or 9 large

Ingredients
  • 1/2 cup (1 stick) unsalted butter, plus more for baking dish
  • 3 ounces bittersweet chocolate, coarsely chopped
  • 1 cup sugar
  • 2/3 cup all-purpose flour
  • 1/4 cup unsweetened Dutch-process cocoa powder
  • 2 large eggs
  • 1 teaspoon grated peeled fresh ginger
  • 1/2 teaspoon pure vanilla extract
  • 1/2 teaspoon ground nutmeg
  • 1/2 teaspoon ground ginger
  • 1/4 teaspoon coarse salt
  • 1/8 teaspoon ground cloves

Directions
  1. Preheat oven to 325 degrees. Butter an 8-inch square baking dish. Line bottom with parchment paper, allowing 2 inches to hang over 2 sides. Butter parchment; set aside. Melt butter and chocolate together in a medium saucepan over medium-low heat, stirring until smooth. Remove from heat, and stir in remaining ingredients.
  2. Pour batter into prepared dish. Smooth top with a rubber spatula. Bake until a cake tester inserted into center comes out with moist crumbs, 30 to 35 minutes. Let cool in pan on a wire rack 15 minutes. Lift out, and let cool completely on rack. Cut into sixteen 2-inch squares. Brownies can be stored in an airtight container at room temperature up to 4 days.
****

{End Results}
Baking Difficultly: 2/5
Ingredient Accessibility: 3.5/5 (Just your basic spices...)
Tastiness: 1.5/5 (With potential, though!)
Attractiveness: 3.5/5
Is it worth it?: If you add some baking powder, they might work and be delicious! So be adventurous and try it out for me and let me know, because I am too busy/lazy to try any recipe twice.

{Pairings}
Drink: Milk ... or ice cream (which is not a drink, but really now, is that going to stop you?)
Song: Crimson and Clover -- Lovin' Spoonful
Activity: Something cozy, like watching a movie on a cold night?

Wednesday, August 26, 2009

[Cookie 036] Rum-Raisin Shortbread

DSC_0073.JPG

Summer is finally ending, and besides getting the an overabundance of back-to-school sale junk mail, the end of August usually means one other much more ominous thing for Californians: fire season. Yesterday, as I was driving home from a really awesome day at the beach, we rounded a curve on the 110 freeway and I saw a huge, conspicuous brown cloud blooming out of the mountains. We immediately turned on the radio and heard about the first of this years summer wild fires, but none of us were very shocked, to be honest. Every year it's like this, and every year people have to evacuate their homes.

DSC_0142.JPG

This morning I woke up and wandered downstairs in my usual state of semi-consciousness, when I got an abrupt deja-vu of me and my family sitting around our campfire during our backpacking trip a couple of weeks ago. I smelled that sweet woody smell of dead wood burning, which I usually love, but in this case really worried me. Then I look out the window and noticed that the sunlight shining in was far redder than usual, and I knew what we were in for. A day of staying cooped up inside--don't even think of doing any physical activity on a day with air quality like this--and trying our best not to inhale.

DSC_0061.JPG

I always feel that when the fires start Southern California turns into Hell. Really, it's very sinister: a red sun, yellow-orange shadows, ash literally falling from the sky like snow, temperatures in the upper 90s, and visibility on the road is noticeably compromised. It's crazy! People's houses are burning, and it's actually pretty scary. The only thing you can do to pass the time is eat cookies, because firing up the oven (pun intended...?) is probably the last thing you want to do.

DSC_0043.JPG

So on that note, I bring you a cookie that is the anti-hell cookie. Rum-Raisin Shortbread, though it does have some dark rum in it (an ingredient only a few might find sinful) is buttery, extremely delicate, and hits you with a bit of refreshing orange zest at first bite. In my opinion, it was a little too heavy on the butter and not heavy enough on the rum, but that's obviously up for debate.

The recipe isn't that hard, but you do have to start on it the night before you want to eat the cookies because the currants (there are no raisins in fact...a poor naming decision on behalf of the editors of The Book) need to soak overnight in rum. But once this little bit of prep-work is done, the rest of the recipe is pretty straight forward. I really like the orange zest in these because it is quite prominent, but I think most of the flavor of the alcohol burned off in the oven--or was masked by the excess of butter-flavor. Maybe you should lower the temperature of the oven and bake them longer? Just a suggestion...

DSC_0036.JPGDSC_0040.JPGDSC_0042.JPG

Anyway, these cookies are slice-n-bake, but also contain currants (obviously), so cutting the cookie dough log can be tricky at times. We tried a super sharp kitchen knife at first, but my dad had the most luck with a serrated bread knife in the end. But still, be careful cutting these because with both currants and coconut shreds the dough doesn't like to slice easily.

DSC_0049.JPG

Unfortunately, mine didn't quite end up looking like the ones in the book. They spread a lot in the oven and lost their shape, which causes me to think that the dough maybe should have been frozen instead of refrigerated? The photo in The Book has them looking thicker, sturdier, and more like shortbread. Perhaps I didn't drain the currants well enough, thus making the dough too wet and more willing to spread in the oven. But they were tasty, so I'd say make them. Nothing fantastic, but they were pretty good, and with maybe a few alterations they could be even better. Hopefully with recipes like these I'll be able to eat my way through fire season until I leave for New York!

DSC_0137.JPG

Rum-Raisin Shortbread
Makes about 4 1/2 dozen

Ingredients
  • 1/2 cup dark rum
  • 1 cup dried currants
  • 2 sticks (16 tablespoons) unsalted butter, room temperature
  • 3/4 cup confectioners' sugar
  • 1/2 teaspoon finely grated orange zest
  • 1 teaspoon pure vanilla extract
  • 1 1/2 cups all-purpose flour
  • 3/4 cup finely shredded unsweetened coconut
  • 1 teaspoon coarse salt

Directions
  1. Combine rum and currants; cover, and let stand at room temperature overnight. Drain, reserving 2 tablespoons rum.
  2. Beat butter, sugar, and orange zest with a mixer on medium speed until creamy and smooth, about 2 minutes. Add vanilla and reserved rum, and beat until combined. Reduce speed to low. Add flour, coconut, and salt, and beat for 3 minutes. Stir in currants by hand.
  3. Form dough into 2 logs, each about 1 1/2 inches in diameter; wrap in parchment, and refrigerate 1 hour (or up to 3 days).
  4. Preheat oven to 325. Remove parchment. Slice logs into 1/4-inch-thick rounds, and space about 1 inch apart on baking sheets lined with parchment. Bake until pale golden, about 20 minutes. Let cool. Cookies can be stored in an airtight container for up to 1 week.

****
{End Results}
Baking Difficultly: 3/5
Ingredient Accessibility: 1.5/5 (Liquor is hard to come by...for me...and those of my age...sometimes)
Tastiness: 3/5
Attractiveness: 2/5
Is it worth it?: Yeah, especially if you like very buttery cookies.

{Pairings}
Drink: Espresso--something small and strong. An Espresso Macchiato would be awesome, in fact.
Song: Paris is Burning -- St. Vincent
Activity: A dainty tea/coffee party

P.S. The Book has begun to show signs of wear and tear!! Disaster! Catastrophe! Call for help! Ahhh!!

DSC_0047.JPG

Saturday, August 22, 2009

[Cookie 035] Gingersnap-Raspberry Sandwiches

Gingersnap-Raspberry Sandwiches

Greetings, earthlings. How's life? Eat anything particularly delicious lately? I hope your making the most of your end of the summer and grabbing up every last stone fruit and veggie from the farmers' markets (and perhaps, your own garden?). I definitely have, and aside from just eating them straight, I've been trying to incorporate as much fresh fruits into the cookies I make as humanly possible.

Grape Jam, Homemade
Grapes

Take, for example, these Gingersnap-Raspberry Sandwich cookies. I did a little tweaking to the recipe and used some homemade jam that my mom made from the grapes that we have growing on our fence in our yard. I love using 100% homemade/homegrown ingredients--when it's possible of course--but let me just say, making jam isn't easy for me. I tried to make the jam the first time around, and everything was going swell, but as soon as I turned my back on the simmering jelly to find a perfectly adorable little Mason jar, I burnt the sugar! It all caramelized and ended up turning into an inedible hard candy. Boo. My mom tried again, and succeeded at not burning the jam, but her homemade pectin didn't solidify the mixture of grapes and sugar, so she had to add some store-bought pectin. It was hard for us, but at least we got to use up our excess of baby grapes that we get every summer!


Our GrapesGingersnaps

Anyways, back to the cookie. I've been meaning to make a sandwich cookie for a while, so I thought that with our newly made jam this recipe would be perfect. The cookies baked up absolutely perfectly and beautifully, holding their shape and forming perfect circles. I think the reason for this is that the recipe calls for vegetable shortening, which has less water than butter and therefore causes the dough to spread less while baking.

Ginger for Gingersnap-Raspberry Sandwiches
Ingredients for Gingersnap-Raspberry Sandwiches

So the gingersnap is perfect. Spot on. Chewy, gingery, perfectly shaped and lovely all around. However, I baked them a little too large, and thus when I spread them with jam and sandwiched them together, the resultant cookie was massive. Plus, my jam was a little too wet and made the cookie sandwich so messy that you could barely eat it without making it look like you had just murdered something on your plate (anyone see that True Blood episode where they eat that souffle made out of a human heart? haha, sorry...). And don't even think of eating this without a plate, because if you do, you might as well just start an ant farm in your lap to begin with. Be careful, eaters, this is a messy business.

Gingersnap-Raspberry Sandwiches, Assembly
Grape Jam

In the end, we ended up eating the cookies plain, without jam, a lot of the time. One recommendation I would give would be to dip them in some coffee--it's completely divine. Or, if you want to make a fancy little dessert for a dinner party or something, you could put 1 or 2 on a plate with some homemade whipped cream and some berry compote or something. Maybe some poached pears or nectarines? Oh, roasted peaches with some honey drizzled on top? Okay, I'm going to get carried away if I continue.

Gingersnap-Raspberry Sandwiches

So yeah, these are tasty, without question. A little hard to eat, but the cookie itself is another example of how Martha can really nail the classic recipes. Now that the cookies are all gone however, I have a lot of leftover jam...any suggestions?

Gingersnap-Raspberry Sandwiches, Mess

Gingersnap-Raspberry Sandwiches

Ingredients
  • 8 tablespoons tablespoons (1 stick) unsalted butter, room temperature
  • 1/4 cup vegetable shortening
  • 2 cups sugar
  • 2 cups all-purpose flour
  • 2 teaspoons baking soda
  • 1 teaspoon ground cinnamon
  • 1 tablespoon ground ginger
  • 1/4 cup pure maple syrup
  • 1 large egg, beaten
  • 1 cup raspberry jam with seeds
Directions
  1. Heat oven to 375 degrees with one rack positioned in center of oven; line a baking sheet with parchment paper, and set aside.
  2. In the bowl of an electric mixer fitted with the paddle attachment, cream butter, shortening, and 1 cup sugar on medium speed. In a large bowl, sift together the flour, baking soda, cinnamon, and ginger.
  3. Add maple syrup to butter mixture; beat to combine. Beat in egg until well combined. Reduce mixer speed to low; slowly add the reserved flour mixture, a little at a time, until well blended.
  4. Place remaining cup sugar in a bowl. Measure 2 teaspoons dough; roll into a ball. Roll dough in sugar; transfer to sheet. Repeat, spacing balls 3 inches apart. Bake until golden, about 12 minutes. Transfer cookies to a wire rack to cool. Form and bake the remaining dough.
  5. Spread about 2 teaspoons jam over half of the cookies; place a second cookie on top of jam-covered ones, making sandwiches. Serve.
****

{End Results}
Baking Difficultly: 2/5
Ingredient Accessibility: 2.5/5
Tastiness: 4/5 (Tastes like what you expect them to)
Attractiveness: 4/5 (Even the messiness looks great)
Is it worth it?: Yeah! You can really take the basic gingersnap recipe and do crazy stuff with it, too. Dip them in chocolate? Add fresh fruits? Ice cream sandwiches! You get the idea...

{Pairings}
Drink: Coffee! Dip it in your cup--it's so seriously good!
Song: For the Dishwasher -- Grandaddy
Activity: Washing your hands, which will be uber-sticky with jelly, trust me.

Tuesday, August 18, 2009

[Cookie 034] Coconut Biscuits

Coconut Biscuits

Apologies in advance for this post. If I wasn't so devoted to writing about each and every recipe from The Book, I would readily toss this recipe for Coconut Biscuits aside and move on to something--anything--else in the book.

Spatula, Rolling Pin, and Cookie Cutter

Usually, when it comes to Martha's less-than-decent recipes, I like to talk about what I found wrong with the recipe and then speculate on why it went awry and how it could be fixed. But, in all honesty, this recipe must have been a huge typo. It just doesn't make sense. The dough is comprised of flour, coconut, sugar, and a few spices. And water to get it to be of a doughy consistency. No butter. No eggs. Nada. Whuhh???

Coconut from Nicole's

And the resultant cookie tasted exactly like you would expect from a recipe that is essentially flour and water. It was hard as a rock, yet a bit chewy. Sweet, coconutty, but texturally a complete disaster. And I just can't believe that Martha would have ever been serious about this. Why, Martha, WHY????

Coconut Biscuits

I guess I'll give you the recipe. For those adventurous chefs out there: If you somehow manage to make this work, or just happen to like it the way it is, do let me know! Am I crazy, or does this recipe just not sound right?

Coconut Biscuits

Coconut Biscuits
Makes 40

Ingredients
  • 1 cup unsweetened shredded coconut
  • 1 cup all-purpose flour, plus more for dusting
  • 1 cup granulated sugar
  • 1/2 teaspoon freshly grated nutmeg
  • 1/4 teaspoon baking soda
  • 1/4 teaspoon salt
  • Sanding sugar, for sprinkling
Directions
  1. Preheat oven to 350 degrees. Toast coconut on a rimmed baking sheet in oven, stirring often, until golden brown, about 10 minutes. Let cool completely.
  2. Stir together flour, granulated sugar, coconut, nutmeg, baking soda, and salt in a medium bowl. Stir in water, 1 tablespoon at a time, until mixture forms a stiff dough (about 5 tablespoons water total). Form the dough into a rectangle. Wrap dough in plastic, and refrigerate until firm, about 15 minutes.
  3. Preheat oven to 375 degrees. Roll out dough to 1/8 inch thick on a lightly floured piece of parchment paper. Transfer dough on parchment to a baking sheet. Refrigerate until firm, about 15 minutes.
  4. Cut dough into 40 small rectangles (about 1 1/4-by-2 1/2 inches each) using a sharp knife. Transfer biscuits to parchment- lined baking sheets using a thin spatula. Lightly brush tops with water. Sprinkle with sanding sugar. Bake until biscuits just turn golden brown, about 11 minutes. Let cool on sheets on wire racks. Biscuits can be stored in an airtight container, up to 1 day.
****
{End Results}
Baking Difficultly: 1.5/5
Ingredient Accessibility: 2/5 (Considering there are basically no ingredients...)
Tastiness: 0/5 (Yeah.)
Attractiveness: 2.5/5
Is it worth it?: No, end of story.

{Pairings}
Drink: Water? Or maybe something fruity and tropical?
Song: Spit it Out -- Brendan Benson
Activity: Finding a new, better recipe

Saturday, August 15, 2009

[Cookie 033] Cranberry-Pistachio Cornmeal Biscotti

Cranberry-Pistachio Cornmeal Biscotti

Bonjour! Salut! J'ai vu Julie & Julia hier soir, et maintenant je suis francaise et tres heureuse--mais je parle la francaise tres mal. Man, I took 4 years of intense high school french, and NOW look at me. Or, rather, look at my poorly constructed sentences and laugh at me. Anyway, I loved the movie, obviously, and really got a kick out of Meryl Streep's performance. I kept trying to draw parallels between the Julie-Julia relationship and my Lizzie-Martha relationship, but really, they are very very different. For one, Julie's quest was much more extreme. For two, I don't necessarily idolize Martha (sorry, girlfriend!) like Julie does Julia.

Cranberry-Pistachio Cornmeal Biscotti

But why am I talking about this movie? Especially when I'm about to discuss a cookie that is so quintessentially Italian: Cranberry-Pistachio Cornmeal Biscotti! Oh, I'll tell you why. Because one of the main things that the Julie & Julia movie stresses is that cooking can be hard. You can have meltdowns. Stuff doesn't always turn out like it does in the book. And after you're done freaking out, you should shrug it off, learn from your mistakes and move on.

Butter Sugar
Pistachios

So, this is where the biscotti recipe comes it. It was hard. Quite hard. Actually, to be fair, only one part of it was difficult, and the result was rather yummy--but it was a tad frustrating. But let's start at the beginning.

Cranberry-Pistachio Cornmeal Biscotti, pre-baked
Dough, pre-baked log

The dough is made of both flour and yellow cornmeal--equal amounts of each--and then studded with chopped pistachios and dried cranberries. Obviously, they would make very nice Xmas cookies, if you celebrate said holiday, but even if you don't the cookie still is very pretty. So you mix up the dough, form it into a log and then demi-bake it until the dough gets golden and a little cracked. Then you have to slice it up into biscotti. This is when I freaked out.

Cranberry-Pistachio Cornmeal Biscotti, demi-baked
Dough, demi-baked and uncut

Disaster struck
A failed attempt at cutting the dough (sorry for the abominable photo

It just so turns out that slicing already crumbly dough that is filled with chunks of nuts and fruits is near impossible. Martha says to use a serrated bread knife, but the dough just crumbles apart as you saw through it. It wouldn't stay together for the life of it!! If it wasn't crumbly because of the crumbly nature of the dough, it was crumbling because the nuts and fruits are difficult to slice through. I ended up with a grand total of about 3 biscotti that held their shape. Fortunately, I could sorta mush the dough into place to get the cookies to stay together.

Cranberry-Pistachio Cornmeal Biscotti, demi-baked
This is the best I could do!

In the end, they baked up nicely, but in my opinion weren't very biscotti like. Scones, more like it. But think about all the times you've had biscotti. It was hard, right? Like a brick! Or more like doorstop or something. Teeth-shattering and not so pleasant. These definitely weren't hard, but then again, maybe that means they weren't biscotti? I dunno, you can be the judge. Perhaps I should have formed the dough-log with more pressure and worked the dough more? Hmmm...whatever, I still have 2 more biscotti recipes, so I have time to master this cookie!

Cranberry-Pistachio Cornmeal Biscotti

Okay, as for you, if you're up for a tricky little recipe, give it a go! The cornmeal is really yummy and they are rather purdy if you manage to cut the biscotti properly. But hear this: don't come complaining to me if you want to pull your hair out. Bon appetit! ...Or should I say Buon Appetito!

Cranberry-Pistachio Cornmeal Biscotti

Cranberry-Pistachio Cornmeal Biscotti
Makes about 2 dozen

Ingredients
  • 1 1/4 cups all-purpose flour
  • 1 1/4 cups yellow cornmeal
  • 1/2 teaspoon baking powder
  • 1/2 teaspoon coarse salt
  • 6 tablespoons unsalted butter, room temperature
  • 1 cup sugar
  • 2 large eggs
  • 1 tablespoon finely grated lemon zest
  • 1 cup dried cranberries
  • 1 cup chopped pistachios
Directions
  1. Preheat oven to 350 degrees with rack in center. Whisk together flour, cornmeal, baking powder, and salt.
  2. Put butter in the bowl of an electric mixer fitted with the paddle attachment; mix on medium speed until smooth. Add sugar and mix until pale and fluffy. Mix in eggs one at a time, until well combined. Reduce speed to low. Add flour mixture all at once; mix until just combined. Add lemon zest, cranberries, and pistachios and mix until combined.
  3. Transfer dough to a baking sheet lined with parchment paper. Pat into a log that is roughly 14 by 3 1/2 inches. Bake until firm, lightly browned, and slightly cracked on top, 30 to 35 minutes. Let cool on sheet on a wire rack, about 15 minutes.
  4. Transfer log to a cutting board. Using a serrated knife, cut on the diagonal into 1/2-inch-thick slices. Arrange slices on a baking sheet lined with parchment. Bake cookies, rotating sheet halfway through, until they begin to brown at edges, 15 to 18 minutes. Cookies can be stored in an airtight container at room temperature up to 2 weeks.

****

{End Results}
Baking Difficultly: 4.5/5
Ingredient Accessibility: 3/5
Tastiness: 4/5 (My parents adored them)
Attractiveness: 3.5/5
Is it worth it?: Hmm...if you've made biscotti and know something I don't, this is a good recipe! Otherwise, it's a little maddening to say the least!

{Pairings}
Drink: Coffee. Espresso? Cappuccino? Choose your poison...
Song: Handle with Care -- Jenny Lewis and the Watson Twins
Activity: Reading poetry whilst wearing rectangular black framed glasses and a beret.