Tuesday, July 28, 2009

[Cookie 030] Pistachio Lemon Drops

Pistachio Lemon Drops

Hello, readers. Ca va bien? Yes? Great. Can't say the same for myself, considering that I just had an infantile breakdown over some obscenely long curtains I got from IKEA, but that's another story for another day. I shall try to remedy my frustration by telling you about these Pistachio Lemon Drops I made today, but that might not be successful since they didn't turn out too hot. But nevermind that, let's continue.

A True Lemon

It's the big 3-0! I can't believe I've made my way through 30 whole recipes since I began this little venture in February. It seems like a lot, but then I realize I still have 145 more to go, and that huge number slaps me right in the face and puts me back in my place (which is the kitchen, evidently). Anyway, I wish I had made a better cookie to celebrate the end of round 2, but what can you do. They aren't all perfect, and that's exactly why I'm doing this.

Lemon Juice for Pistachio Lemon Drops

Pistachio Lemon, Dropped

So, onto why I picked this recipe in the first place. My brother and his girlfriend just moved into a new place, so I wanted to make them a nice house-warming gift, obviously cookies. But I had to pick my recipe carefully, because as unholy and unbelievable as it sounds, my brother does not like chocolate. I know--don't even get me started. So that ruled out about 70% of the recipes (I just made that percentage up, btw), and I eventually came to this recipe, which I had my eye on for a while.

Pistachio Lemon Drop Dough

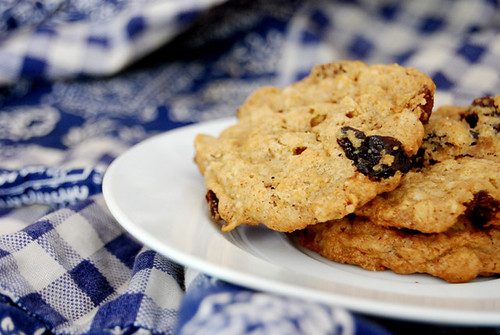
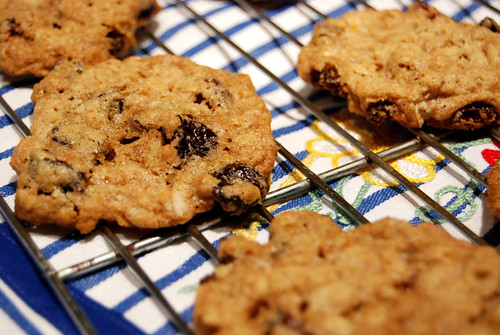
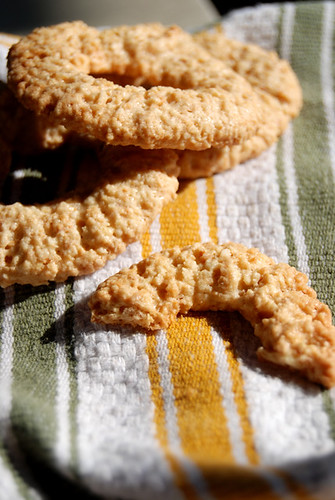
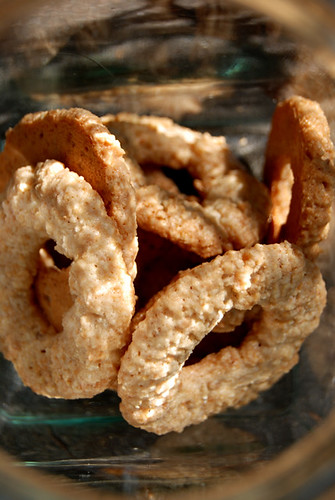
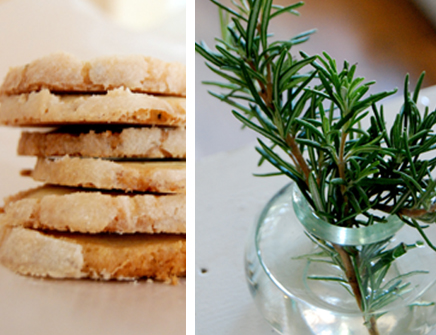
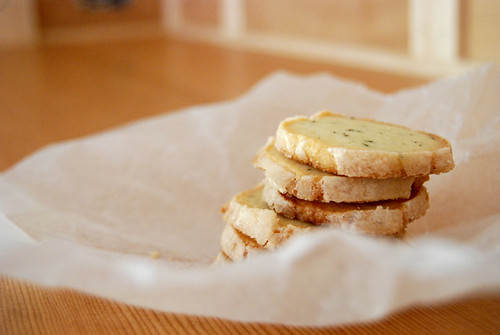
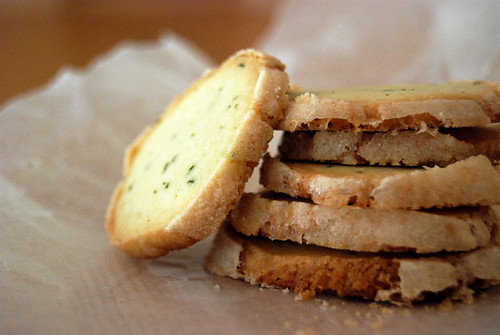
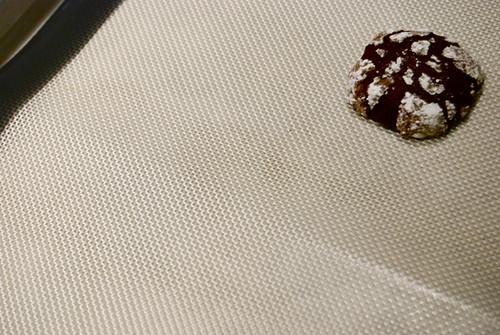
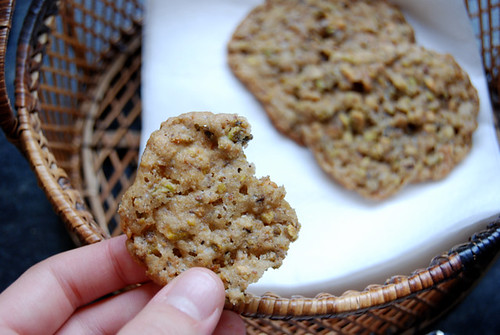
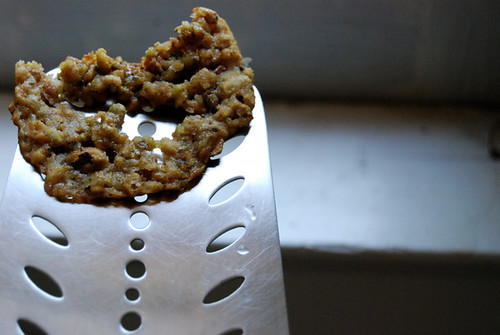
Oddly enough, while many recipes do not call for any butter when egg whites are used, this one only has 1 egg white and a whole cup of packed brown sugar. RED FLAG! The cookies were insanely sweet and sticky, and though they did look like the ones in the book, I just couldn't really stomach them, let alone give them away as a present! Fortunately, my mom grew to like them, but I still had to make a different cookie to give to the new home-renters (see next post, coming soon to your computer). Anyway, I would liken their super-sweet flavor to that of a praline, just a praline with a bunch of pistachios in it. Next time, if I were to make these again, I would add much more lemon juice and less sugar, for sure. If you're a huge pistachio fan, maybe you should give these a shot, because they are also really really strong on the pistachio front.

Pistachio Lemon Drop, Massacred

Oh well, you can't win 'em all. The next cookies I made were fantastic, so stay tuned. In other news, I am getting so pumped up for the Julie & Julia movie coming out soon! Ah!!!! My life!! I'm so ready for Julie & Julia Part Two: Lizzie & Martha, Cookie Edition (pre-production, expected release 2045). I'm even reading Julia Child's memoirs (My Life in France), and I am so in love with her life, oh my god. Oh my god. Okay, enough, you're here for the recipe:

Pistachio Lemon Drops

Pistachio Lemon Drops
Makes about 2 dozen

Ingredients
  • 1 large egg white
  • Pinch coarse salt
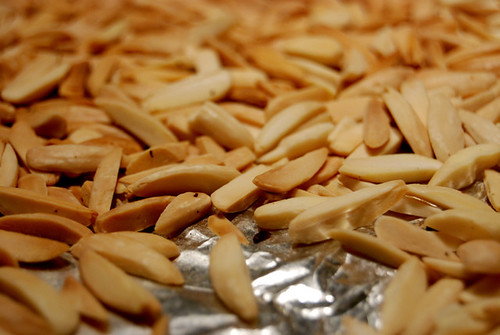
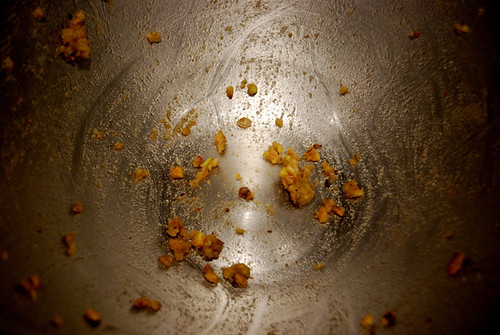
  • 1 cup toasted salted pistachios, finely chopped (about 4 1/2 ounces)
  • 1 cup packed light-brown sugar
  • 1 tablespoon all-purpose flour
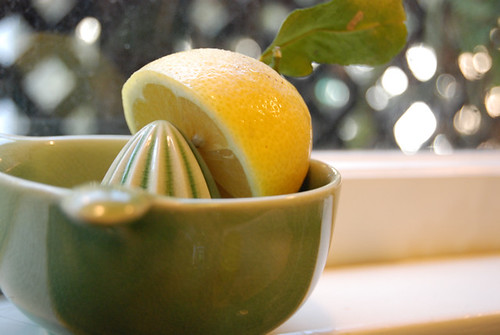
  • 1/2 teaspoon fresh lemon juice

Directions
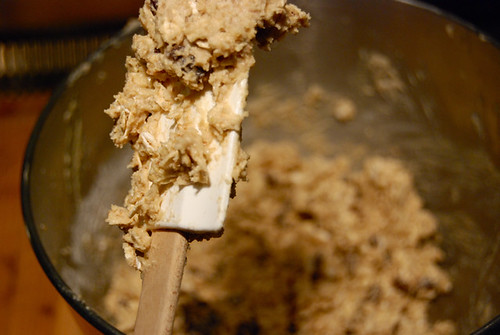
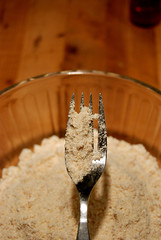
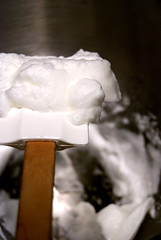
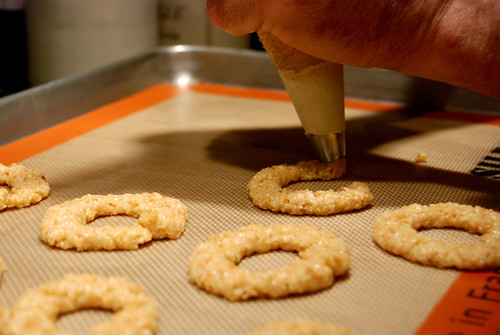
  1. Preheat oven to 325 degrees. Put egg white and salt in the bowl of an electric mixer fitted with the whisk attachment, and mix on medium-high speed until stiff peaks form. Reduce speed to medium; mix in nuts and sugar, then flour and lemon juice.
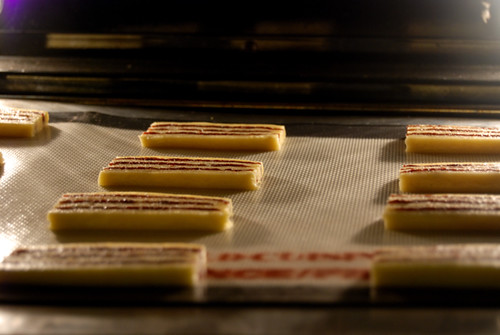
  2. Using a 1 1/4-inch ice cream scoop, drop dough onto baking sheets lined with parchment paper, spacing 2 inches apart. Bake cookies, rotating sheets halfway through, until edges are golden, 10 to 12 minutes. Let cool on sheets on wire racks. Cookies can be stored between layers of parchment in airtight containers at room temperature up to 3 days.
****

{End Results}
Baking Difficultly: 2/5
Ingredient Accessibility: 3/5
Tastiness: 1.5/5 (Unless you love uber-sweet, uber-salty, uber-cookies)
Attractiveness: 2/5
Is it worth it?: Frankly, no. But if you alter the recipe, it might be really good, so if you're feeling feisty...

{Pairings}
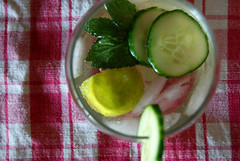
Drink: Water, to calm down your taste buds. Or lemonade, to boost up the lemon flavor that gets stifled.
Song: For No One -- The Beatles
Activity: Going into sugar-induced epileptic shock. (Okay, that's a little harsh, but really now...)

Saturday, July 25, 2009

[Cookie 029] Oatmeal Raisin Cookies

Oatmeal Raisin Cookies

Okay, so as of late I've been making more "unusual" types of cookies: ones that resemble onion rings, ones that (vaguely) resemble Griffendor scarves, ones that use fresh garden herbs...fancy stuff. And after all this, I had begun to crave for a more traditional cookie--a drop cookie, with your standard cookie ingredients, and yet one that would still stand out. One that you can curl up with on a cold, windy night; one that will be there for you in your darkest hour, when everyone else in your life has deserted you--okay, maybe that's a bit much, but you get my drift.

Generally I save the easiest recipes with the most fundamental ingredients for when I'm off at school (considering my budget is significantly tighter, and my overall cooking arrangement much less...enhanced. Meaning I lack: a Viking stove, KitchenAid, any spice other than cinnamon, you know). But when your stomach wants an Oatmeal Raisin Cookie, you simply cannot deny it this simple right.

Oatmeal Raisin Cookie Dough

So one morning I woke up knowing that that day would be the day. The Oatmeal Raisin Cookie Day that my heart so pined for. But with a twist: I chose to add the remainder of dried cherries from the Striped Icebox Cookies into the batter, along with the raisins. I must say, I deserve a pat on the back for this ingenious idea (okay, it was Martha's idea, whatevvvver) because the sourness of the cherries is exactly what this usually sweet cookie needs. And because I only added about 1/3 of a cup of cherries, you only got a bite of cherry every now and then, so it was like a nice little surprise.

Wheat Germ!

The recipe as a whole, once again, proves Martha's ability to provide a perfect recipe for a classic cookie. But instead of producing a boring, chewy cookie without much kick, the inclusion of toasted wheat germ lends the cookie a nice crunchy bite and great texture. Although the cookies are listed in the "soft and chewy" category, you are supposed to press down the balls of dough a bit on the cookie sheet, and so they spread out thin and get a little crispy--which I really loved.

Oatmeal Raisin Cookies

My parents loved the cookies, as did I, and we all agreed that the dried cherries really really helped, so if you have some on hand I definitely encourage you to throw them in. But if you don't, the cookie is still fantastic, and I see no reason in using any other Oatmeal Raisin Cookie recipe. Okay, I'll leave you with the recipe now...

Oatmeal Raisin Cookies

Oatmeal Raisin (and cherry!) Cookies
Makes about 5 dozen

Ingredients
  • 3 cups old-fashioned rolled oats
  • 1 cup all-purpose flour
  • 2 tablespoons all-purpose flour
  • 1/2 cup toasted wheat germ
  • 1 teaspoon baking soda
  • 1 teaspoon baking powder
  • 1/2 teaspoon ground cinnamon
  • 1/2 teaspoon coarse salt
  • 1 cup (2 sticks) unsalted butter, softened
  • 1 cup granulated sugar
  • 1 cup packed light-brown sugar
  • 2 large eggs
  • 1 teaspoon pure vanilla extract
  • 1 1/2 cups raisins (if you add cherries as well, make sure that the total amount of dried fruits is still 1 1/2 cups!)
Directions
  1. Preheat oven to 350 degrees. Stir together oats, flour, wheat germ, baking soda, baking powder, cinnamon, and salt in a large bowl; set aside. Put butter and sugars in the bowl of an electric mixer fitted with the paddle attachment. Mix on medium speed until pale and fluffy, about 5 minutes. Mix in eggs and vanilla. Reduce speed to low. Add oat mixture; mix until just combined. Mix in raisins.
  2. Using a 1 1/2-inch ice cream scoop, drop dough onto baking sheets lined with parchment paper, spacing 2 inches apart. Flatten slightly.
  3. Bake until golden and just set, about 14 minutes. Let cool on sheets on wire racks 5 minutes. Transfer cookies to racks using a spatula; let cool completely. Cookies can be stored in airtight containers at room temperature up to 3 days.
****

{End Results}
Baking Difficultly: 1/5
Ingredient Accessibility: 3.5/5
Tastiness: 4.5/5 (Perfect! Crispy and chewy...very nice)
Attractiveness: 2.5/5
Is it worth it?: If you want an Oatmeal Raisin Cookie, look no further. This is it.

{Pairings}
Drink: Orange Juice (I dunno why I think this sounds like a good idea...maybe I'm nuts)
Song: Old School (feat. Talib Kweli) -- Danger Doom
Activity: Watching cartoons on a Saturday morning

Tuesday, July 21, 2009

[Cookie 028] Amaretti Crisps

Amaretti Crisps, Half Eaten

I have a very hard time falling for the so called "healthy" cookie. I simply do not believe it exists, and if it does, it probably doesn't taste that good or simply isn't really a cookie. Sure, I've seen a fair share of vegan recipes, ones fortified with 30 pounds of whole grains, and those that substitute butter with various low-calorie remedies, but I am still not convinced. I do not want my cookie to try and be something it isn't: a cookie, by definition, cannot--nay SHOULD not--be good for you. That's half the fun of eating one, right?

Amaretti Crisps

Right. But, having said that, there are indeed a few recipes in The Book that happen to be ever so slightly more healthful than the others. Generally speaking, cookies that are crumbly and sandy have more butter in them than others do because in order to achieve this crumbly texture, butter is needed to break up the glucose strands in the flour, thereby giving the cookies the distinctly brittle quality (think Classic Shortbread...). Meringues, on the other hand, have no butter whatsoever, and instead rely heavily on egg whites. And now we come to my cookie du jour: the Amaretti Crisps I made, again with my father, were completely devoid of butter, and perhaps on the "lighter" side of the cookie-nutrition spectrum.

Toasted Almonds for Amaretti Crisps

The fat in these cookies comes entirely from the excessively huge amount of toasted almonds in them, which are ground up with confectioners' sugar. Then you add a bit of almond extract (not Amaretto, in fact, which is much too mild in almond flavor) and then fold in only 2 egg whites. This is not when you are supposed to drop the glass bowl that you had the almond mixture in on top of the fluffy egg whites and squash them to oblivion. That is not advisable.

Almond/Sugar PowderEgg Whites
O, Amaretti Crisps!

Aside from that little fumble of mine, the cookies came out very delicious, just not as airy as I had expected. Piping the dough into Os is a little tedious at times, but the recipe as a whole is very quick and easy. One issue I ran into was the baking time: my cookies were golden and hard in almost as little as half the time suggested (15 minutes, or so). So, keep an eye on these babies! If you pull them out of the oven in time, you should have some cute little cookies that look like either oversized cheerios, onion rings, or both.

Play with yo foodz, pt II
Play with yo foodz

And they are just too too easy to play with! So here's to fun, "healthy" cookies--and to playing with your food.

Amaretti Crisps

Amaretti Crisps
Makes 20

Ingredients
  • 1 3/4 cups sliced almonds (about 5 1/2 ounces)
  • 1 cup confectioners' sugar
  • 2 large egg whites
  • 1/2 teaspoon pure almond extract
Directions
  1. Preheat oven to 350 degrees. Spread almonds in a single layer on a rimmed baking sheet, and toast in oven until lightly browned and fragrant, 7 to 9 minutes. Remove from oven; let cool.
  2. Combine almonds and sugar in the bowl of a food processor fitted with the metal blade, and grind to a fine powder. Transfer to a medium bowl. In a separate bowl, beat egg whites until stiff peaks form. Fold egg whites into almond mixture; fold in almond extract.
  3. Line a baking sheet with parchment paper. Transfer almond mixture to a pastry bag fitted with a 1/2-inch plain tip. Pipe twenty 2-inch rings onto prepared sheet, about 1 inch apart. Bake until golden brown and firm to the touch, about 25 minutes. Remove from oven, and immediately transfer to a wire rack to cool completely.
****

{End Results}
Baking Difficultly: 4/5
Ingredient Accessibility: 2/5
Tastiness: 4/5 (Really almond-y!)
Attractiveness: 4/5
Is it worth it?: Yes, it is. But it uses a helluva lot of almonds for only 20 cookies.

{Pairings}
Drink: English Breakfast tea with milk
Song: Instant Party (Circles) -- The Who
Activity: Hula-hooping

Monday, July 20, 2009

[Cookie 027] Rosemary Butter Cookies

Rosemary Butter Cookies

I like to think that summer in sunny California is pretty swell. It doesn't get humid, it doesn't rain, and it's perfect beach weather all the time. However, by the time mid-July rolls around, something happens to the weather that can make everything come to a halt. That pleasantly dry summer heat seems more like a burning, oppressive blanket eager to suck every ounce of sweat and productivity out of any individual stupid enough to step foot outside.

Rosemary

So I lock myself in the house for the majority of the day during this time of the year. I crank up the air-con, close all the curtains, and try not to move. Year after year this method of hibernation works out pretty well, and I end up watching a handful of movies that I would never have gotten around to viewing at any other time of the year. This year, however, with this whole epic cookie project underway, baking seems completely and utterly unfeasible, despite my intense desires to press on onto new recipes. The mere thought of heating up my kitchen one degree hotter than it already is makes me begin to perspire already.

But I had to. I had to bake--no choice! It was my friend's birthday party last night and I promised to bring these Rosemary Butter Cookies to the party! What could I do? Baking them outside on the concrete was a possibility, but altogether too unsanitary (hello spiders!). I thought long and hard and decided to assemble the dough late at night and try to bake the cookies early in the morning. It was the best I could do.

Rosemary Butter Cookies 5

Now, on to the recipe itself. Everything is very standard for a slice-n-cut butter cookie: meaning, 2 sticks of butter, some sugar, flour, vanilla, you know the drill. Then you add a whole tablespoon of fresh rosemary for the flavor. I strongly advise you to use fresh rosemary, because it's far, far better and you can't simply substitute the dried stuff. Dried rosemary is much more potent and powerful, so if you insist on using it, only use 3/4 teaspoon!! Not a whole tablespoon. It should still taste the same, but still, I'd go with the real stuff--but maybe that's just because we have a rosemary bush in my backyard that the size of an elephant.

I did run into a minor issue, mind you. Martha has you add 2 1/2 cups sifted flour, meaning you sift the flour and then measure the correct amount. Sift, then measure, remember! I sifted it a few too many times though, and therefore didn't add enough flour and the dough was way too wet, so I continued to add a little bit of sifted flour here and there until the dough was workable (it baked up fine in the end). Then you divide the dough into 2, roll into logs, freeze.

Rosemary Butter Cookies 6

The next morning, I only had to brush the logs with egg whites and roll them in the fine sanding sugar before slicing and baking them. I, for some reason, chose to use baker's sugar instead of sanding sugar--BIG MISTAKE! Well, nothing epic, but baker's sugar is too fine and melts when you bake it. Thus, the sugar on the edges wasn't adhered to the cookie very well, and would fall off very easily when handled. Oh well, tasted great anyways! A very delicious cookie no doubt, and my friends loved it. A "garden cookie" as they put it; one that would be perfect for tea parties on the terrace, if that's your style.
This:
Cheese and Utensils
Plus this:
Fresh Summer Drink
Plus this:
Rosemary Butter Cookies 3
= Perfect summer evening

Now, if you are up for heating up your kitchen, or you live in the southern hemisphere, bake these! They are so fun and unusual and fancy! Crunchy and subtle! Pretty and dainty! Not too sweet, not too bland! Go! Do it! To stay cool, you could always stay in the freezer with the cookie logs for an hour or so...

Rosemary Butter Cookies 1

Rosemary Butter Cookies
Makes about 5 dozen

Ingredients
  • 1 cup (2 sticks) unsalted butter, softened
  • 3/4 cup granulated sugar
  • 1 large egg plus 1 egg white, beaten
  • 1 teaspoon pure vanilla extract
  • 2 1/2 cups sifted all-purpose flour
  • 1 tablespoon finely chopped fresh rosemary
  • 3/4 teaspoon coarse salt
  • 1/2 cup fine sanding sugar
Directions
  1. Put butter and granulated sugar in the bowl of an electric mixer fitted with the paddle attachment; mix on medium speed until pale and fluffy, about 2 minutes. Mix in whole egg and vanilla. Reduce speed to low. Add flour, rosemary, and salt, and mix until combined.
  2. Halve dough; shape each half into a log. Place each log on a 12-by-16-inch sheet of parchment. Roll in parchment to 1 1/2 inches in diameter, pressing a ruler along edge of parchment at each turn to narrow log. Transfer to paper-towel tubes to hold shape, and freeze until firm, about 1 hour.
  3. Preheat oven to 375. Brush each log with egg white; roll in sanding sugar. Cut into 1/4-inch-thick rounds. Space 1 inch apart on baking sheets lined with parchment. Bake until edges are golden, 18 to 20 minutes. Let cool on sheets on wire racks. Store in airtight containers at room temperature up to 3 days.
****
{End Results}
Baking Difficultly: 3/5
Ingredient Accessibility: 3/5 (Just the fresh rosemary)
Tastiness: 4/5
Attractiveness: 4/5 (Woulda been prettier if I used the right sanding sugar...)
Is it worth it?: Yeah!

{Pairings}
Drink: Earl Grey Tea, over ice and/or a Mint Julep
Song: Scarborough Fair -- Simon and Garfunkel
Activity: Garden cocktail party

Thursday, July 16, 2009

[Cookie 026] Striped Icebox Cookies

Striped Icebox Cookies

I am going to divulge a secret about my personal life right now. I love Harry Potter. Not really his character in particular, but the story in general. The books, a few of the movies, you know. And I don't think this should be at all surprising given my age demographic and that I essentially grew up with it.

New Cookie Jar

Now unless you live under a rock or have more important things to do (the latter of which is highly probable and quite understandable), you would know that the 6th cinematic installment of the HP series has just recently graced American movie theaters. So, my friends and I went to see the movie opening night at 12:01 am. Big nerds, yeah whatEVer! We had a little pregame party as well, and this is when the cookies come in. I needed a good recipe that somehow related to Harry Potter. I considered the Magic Blondies, but other than their name, they weren't Harry Potter at all. I decided on the Striped Icebox Cookies because I thought they looked like Griffendor Scarves, what with their stripes and maroon-gold color pallette. Yeah, might be a stretch, but they were really delicious!

CherryBLOOODDD
Sinister looking!

Now onto the recipe. The first thing it has you do is make the filling, which is comprised of dried cherries, a red jam, sugar, and a bit of Almond Extract. Initially, while adding in the tablespoon of sugar to this already sweet sticky mess, I was certain that the filling would be way too sweet, but in the end it has a great tartness to it that compliments the rest of the cookie very nicely. I went with raspberry jam, because of the color, and also because of all the seeds (which lend a nice texture to the cookie).

Cherry-Raspberry-Almond Filling
Cherry/Raspberry/Almond Spread

After you run it through a food processor, you heat up with mixture in a pot until it boils. Note how in the first picture the filling looks pretty hefty and solid. I was sure that it would be impossible to boil, but if you are patient and don't heat it too fast (it can burn/caramelize easily), it will eventually bubble--albeit quite slowly and stickily. I was about to make some sort of nerdy Harry Potter reference here, but I can't think of one that isn't completely cringe-inducing.

Please excuse the next two ugly, horribly lit photos!

Rolling Dough into 9" x 3.5"
Spreading the Cherry/Raspberry Filling

So, after you whip up the simple cornmeal dough, Martha has you roll it out into a 9" by 3.5" rectangle of about 1/4" thickness. I though that this would be the only time I would have a chance to shape the dough, so I made a quick stencil and rolled the dough into it so it would have the correct dimensions. This isn't necessary, because after you freeze all the layers, she has you cut them down to size anyways.

Then you freeze the four 9" x 3.5" layers for a bit, and then you spread the cooled filling onto them. This can be a tad frustrating, because the filling is really really really thick and sticky and very hard to manipulate without rubbing bits of the dough off. I used the very tip of a butter knife to slowly move the filling across the expanse of dough. Just take your time!

Cleaning the edges of the Striped Icebox Cookies

Moving along. Then, after sandwiching the layers together and freezing them, you are supposed to cut off the edges and essentially trim the brick of dough down significantly. I suppose she thinks you are going to just throw out these perfectly delicious pieces of cookie dough, but don't. Eat them. Or bake them and make a few ugly cookies. They taste great either way...just don't waste them!

Cherry-Raspberry-Almond Stratum!DSC_0108.JPG
Slice, slice, slice!

Striped Icebox Cookies, baking
Bake, bake, bake!

That's about it! They taste pretty good out of the oven, but once again I'd recommend you let these sit and cool completely before diving in. They need time to get crunchy! Either way, though, the tart cherry filling is just right, and the cornmeal in the dough is a really unique touch. A top notch cookie, even though it's hardly Harry Potter themed. Sorry, I just didn't have a lightening-shaped cookie cutter!

Striped Icebox Cookies
Striped Icebox Cookies in New Jar
P.S. How much do you love my new cookie jar?? Perfection!


Striped Icebox Cookies
Makes 3 dozen

Ingredients
  • FOR THE FILLING
  • 3/4 cup dried cherries
  • 1/3 cup sour cherry jam, or preserves (I used raspberry jam--very good choice!)
  • 1 tablespoon sugar
  • 1/8 teaspoon almond extract
  • FOR THE DOUGH
  • 1 1/4 cups all-purpose flour
  • 1/2 cup yellow cornmeal
  • 1 teaspoon baking powder
  • 1/4 teaspoon salt
  • 8 tablespoons (1 stick) unsalted butter, room temperature
  • 1 cup sugar
  • 1 large egg
  • 1 teaspoon pure vanilla extract
Directions
  1. Make the filling: In a food processor, combine dried cherries, jam, and sugar. Process until coarsely pureed. Transfer to a small saucepan over medium heat. Cook, stirring occasionally until it comes to a boil. Remove from heat, and stir in almond extract. Let stand until cool.
  2. Make the dough: In a medium bowl, whisk together flour, cornmeal, baking powder, and salt; set aside.
  3. In the bowl of an electric mixer fitted with the paddle attachment, cream butter and sugar on medium speed until light and fluffy, 2 to 4 minutes. Add egg and vanilla; incorporate. With mixer on low speed, add flour mixture to butter mixture; mix to combine.
  4. Transfer dough to a clean work surface, and divide into four equal portions. Place one portion between two pieces of parchment paper that are at least 12 inches square. Roll out dough to a 3 1/2-by-9-inch rectangle about 1/4 inch thick. Repeat with the remaining three portions dough. Transfer to a baking sheet and freeze for about 30 minutes.
  5. Assemble the cookies: Remove dough from freezer. Remove top pieces of parchment from dough. Spread one-third of the filling evenly over one portion of dough. Invert second rectangle over the first; remove parchment on top. Repeat layering process, leaving the top rectangle uncoated. Wrap in plastic wrap and transfer to freezer for 1 hour.
  6. Preheat oven to 350 degrees. Line baking sheets with Silpats (French nonstick baking mats). Trim dough to a 3 1/4-by-8 1/2-inch brick. Cut the brick into 1/4-inch-thick rectangles; place on baking sheets, spaced 2 1/2 inches apart.
  7. Bake until light golden around the edges, 12 to 15 minutes. Transfer to a wire rack to cool. Store in an airtight container for up to 2 weeks.
****

{End Results}
Baking Difficultly: 4/5
Ingredient Accessibility: 3.5/5 (Don't substitute raisins or something for the dried cherries!)
Tastiness: 4.5/5
Attractiveness: 4/5 (A really unusual looking cooking--impressive design)
Is it worth it?: Definitely! If you have a bit of time to devote to these, they will win you many compliments!

{Pairings}
Drink: A black breakfast tea
Song: Red and Purple -- The Dodos
Activity: Outdoor picnic--these cookies travel well

(Trying something new with this whole "pairings" business. Let me know what you think!)

Friday, July 10, 2009

[Cookie 025] Chocolate Crackle Cookies

Chocolate Crackle Cookies, Gettin Eaten

Hey there readerz. I come to you to tell of a saddening cookie experience, or at least one slightly tinged with frustration. Okay, so everyone makes mistakes yadda yadda no one's perfect blah blah don't cry over spilled milk. But nonetheless, spilling too much milk into a labored-over batch of rich, Valrhona-y chocolate cookie dough still hurts my soul.

Chocolate Crackle Cookies

Alright, let's back up a bit. A few nights ago, my dad spontaneously suggested that we bake up some cookies, and I of course whole-heartedly agreed, despite my intentions to go to bed (yes, I've been going to bed at 10:30, whut!). We compared recipes to the ingredients we had on hand, and in the end decided to make the Chocolate Crackle Cookies that we had both had our eye on for some time. We had all the ingredients save some whole milk. Enter: potentially problematic situation.

Valrona Chocolate

We decide that since we had some leftover heavy cream, we would just whip up some whole milk by mixing the cream with some regular 1% milk. No problem! But we made 1 cup of it, when we only needed 1/6 cup! Fine. Shouldn't be a problem if we were careful. Needless to say, I was not careful, and promptly poured in about 3x too much milk to the chocolately mess.

Messiness

I flipped! Seriously, I was very, very upset. My world came crashing down, and depsite my father's kind kind consolations, I still couldn't get over that I had essentially wasted a bunch of good ingredients AND an entire Valrhona 61% Cacao Chocolate bar. That's like throwing away holy water, or some other equally cherished item that could fulfill this lame analogy.

Chocolate Crackle Cookie Dough

So instead of pitching the whole mess out, we decided to double the recipe, but omit the addition of more milk obviously. I think, in the end, we covered our butts quite well in fact. The cookies came out a little more like brownies, in my opinion, but they were still quite striking in appearance and who doesn't like brownies anyways, right?

Chocolate Crackle Cookies, not yet crackled

One thing to note about the recipe: When my dad baked the first batch (obviously having doubled the recipe we had many batches to bake) he didn't roll the balls of dough in the powdered sugar enough. They came out not very white in the sugary areas, but if you make sure to fully coat the balls in the powdered sugar after rolling them in the granulated sugar, you should be fine. Be diligent! It is a tad time consuming and messy, but they look great if you spend a good amount of time on them. Really roll em around until they are thoroughly coated!

Chocolate Crackle Cookies

One Chocolate Crackle Cookie

Chocolate Crackle Cookies
Makes about 5 dozen

Ingredients
  • 8 ounces bittersweet chocolate, melted and cooled
  • 1 1/4 cups all-purpose flour
  • 1/2 cup Dutch cocoa powder
  • 2 teaspoons baking powder
  • 1/4 teaspoon salt
  • 8 tablespoons (1 stick) unsalted butter, room temperature
  • 1 1/3 cups light-brown sugar, firmly packed
  • 2 large eggs
  • 1 teaspoon pure vanilla extract
  • 1/3 cup milk
  • 1 cup confectioners' sugar, plus more for rolling
Directions
  1. Melt chocolate in a heatproof bowl set over a pan of simmering water, stirring. Set aside and let cool. Sift together flour, cocoa powder, baking powder, and salt in a bowl.
  2. With an electric mixer, beat butter and brown sugar on medium speed until pale and fluffy, 2 to 3 minutes. Mix in eggs and vanilla, and then the melted chocolate. Reduce speed to low; mix in flour mixture in two batches, alternating with the milk. Divide dough into four equal pieces. Wrap each in plastic; refrigerate until firm, about 2 hours (I kept my dough in the refrigerator for a few days, baking batches when I wanted to, and this worked fine.)
  3. Preheat oven to 350F. Divide each piece into 16 1-inch balls. Roll in granulated sugar to coat, then in confectioners' sugar to coat. Space 2 inches apart on baking sheets lined with parchment paper. Bake until surfaces crack, about 14 minutes. Let cool on sheets on wire racks.
****

{End Results}
Baking Difficultly: 3/5
Ingredient Accessibility: 2/5
Tastiness: 4/5 (Nothing all that different or special, but tasty)
Attractiveness: 4.5/5 (The white and black contrast* is really striking!)
Is it worth it?: Yeah, but do follow the directions. I'd like to know how they turn out with the correct amount of milk...

*Possibly distasteful/disrespectful side note: I went to Michael Jackson's Memorial service-- photos at my other blog and my Flickr