Saturday, October 5, 2013

[Cookie 103] Icebox Spirals and Bull's-Eyes


God this feels so WEEEEIRD!!!!!!! I can't believe I'm doing this again.  What's wrong with me?! Everything has changed since I left the blogging world.  Google Reader doesn't even exist anymore, so how will people even know about this blog? Actually, if there's anyone out there reading this, would you mind giving me some insight into how people/you read blogs these days? Like, how are you reading this right now? I know all about Pinterest and Instagram (follow meee), but what about BLOGSSSSS?? Are they, like, so 2010? Help!

Okay, so let's get to know each other again, yeah? Since I last posted, I have graduated college, moved into a really awesome apartment, traveled around India for 4 months, been using a laptop with a non-functioning period key for nearly a year, and finally got a legit job at a photo company.  This is the lady who is writing to you:


And here are some nice things she has in her apartment (Baryshnikov and Dahlias, both are sexy):


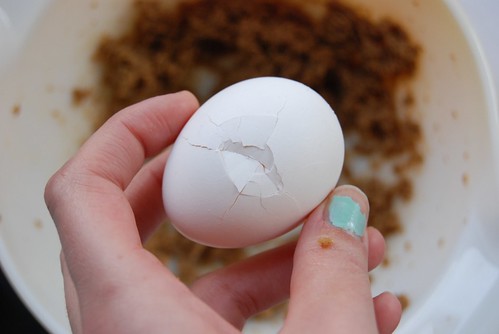
She has NOT been baking very much, that's for damn sure.  Until now--I am so ready to do this.  I hate the fact that my triumphant return is marked by such a pathetic, boring, lame cookie, but hey, I'm still the same girl who wants to bake cookies without having to go food shopping for any ingredients other than sugar and butter.  So I made these guys.  But don't worry--I've pretty much exhausted all the really boring recipes from the book, so now I have no choice but to buy expensive, weird ingredients and bake difficult, tedious recipes!


Anyways, let's get to it.  This is a total standard icebox cookie recipe, so you can make the dough and keep it in the freezer for a century and bake a random cookie here and there when you feel like it.  The only way I can see Martha justifying including this boring recipe in her book is because she made fucking spirals with the dough, but seriously Martha, we all know you're really good at making boring shit look pretty.  Come on! A little flavor would have been nice.  Also, these were totally NOT crumbly and sandy! That may have been my fault, but still, I'm upset.


So I tried to spice it up by using Droste cocoa and this fancy vanilla extract, but it really didn't make much of a difference.

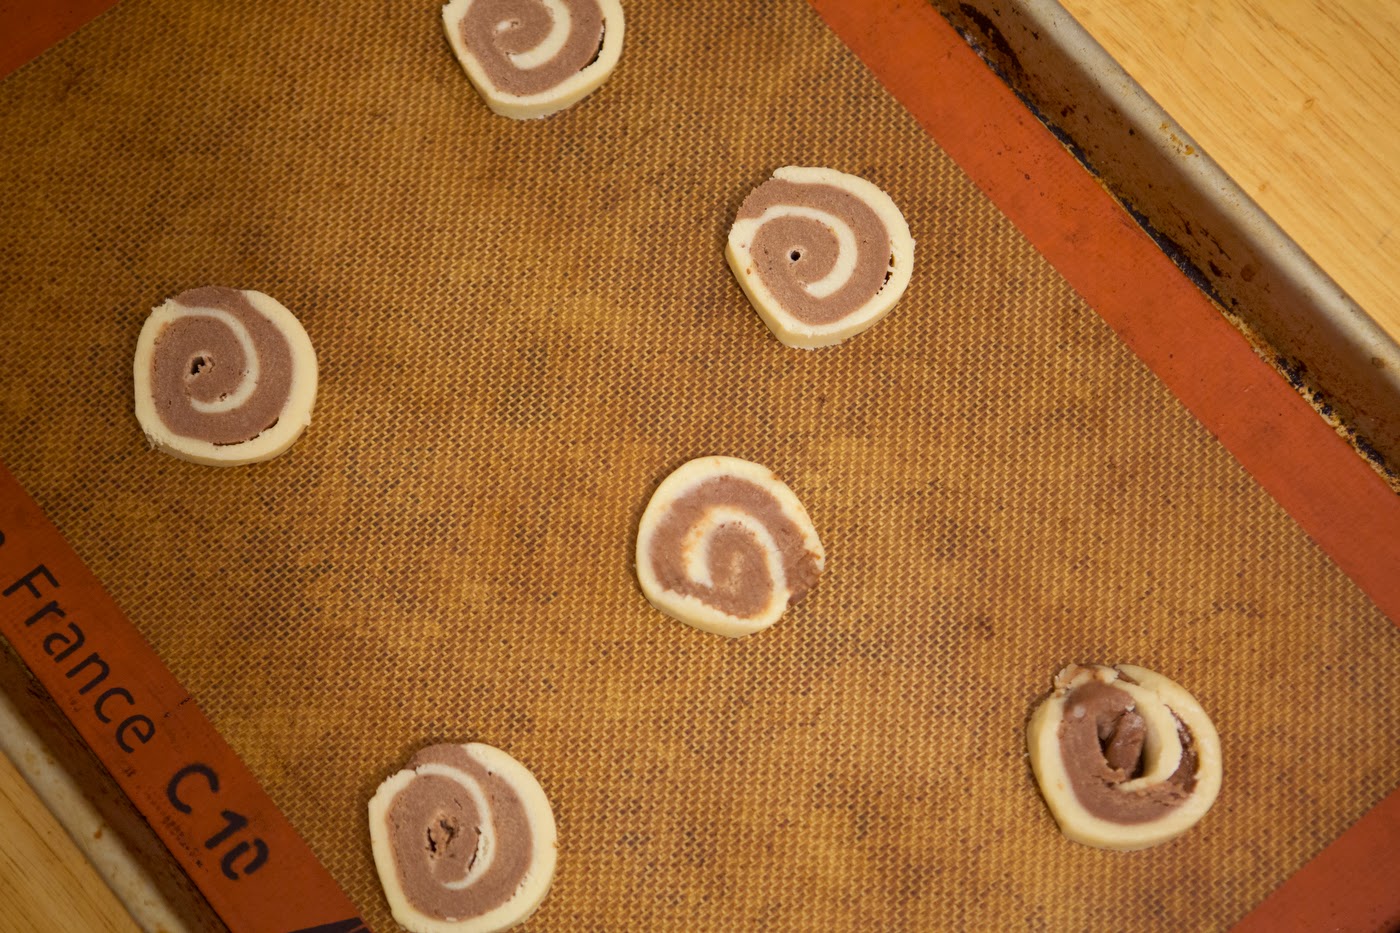
And I didn't even TRY to make the bull's-eyes, because those look so LAME!!!! Like, who cares about those guys when you've got spirals around.


In summation, this recipe is in no way remotely worth the effort of rolling the dough into a pretty spiral log.  The cookie is nice only if you've just discovered that you had already made the dough several years ago and it's been sleeping in your freezer collecting freezer burn and now you can have surprise cookies! I would not bake them if you want cookies right now--maybe bake them in preparation for nuclear apocalypse? Otherwise, choose from any of the other delicious, simple, fast recipes in the book.


Icebox Spirals and Bull's-Eyes
Makes 34 bull's-eyes and 28 spirals

Ingredients


  • 1 1/2 cups (3 sticks) butter
  • 1 3/4 cups sugar
  • 1 teaspoon salt
  • 2 eggs, plus an extra egg white for "glue"
  • 3 teaspoons pure vanilla extract
  • 5 cups flour, plus more for work surface
  • 2/3 cup milk
  • 1/4 cup cocoa powder

Directions
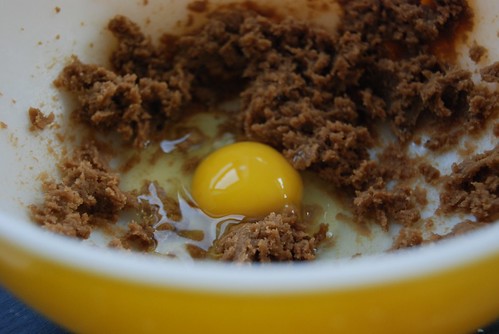
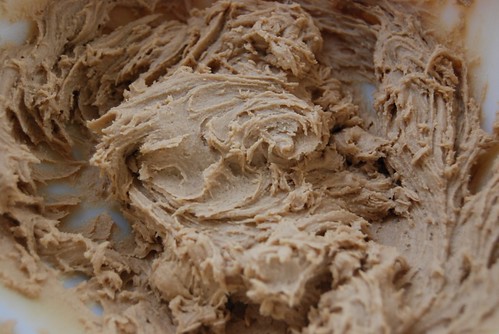
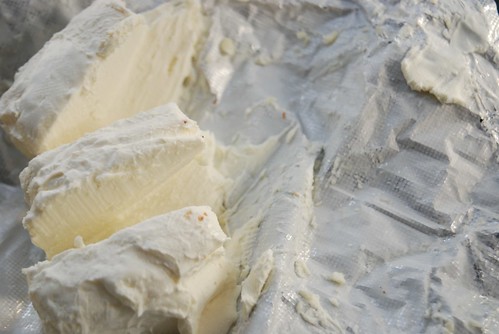
    1. Using the electric mixer, mix the butter and the sugar until creamy. Add the eggs and the salt, and mix well. Beat in milk and vanilla. Add flour a little at a time, mixing it in until all of it has been incorporated.
    2. Divide the dough into balls, one for each color. For chocolate dough, add cocoa (1/4 cup is enough to flavor half a batch). Mix well with electric mixer. For colored dough, start with 1/4 teaspoon food coloring, and mix well. Add more in tiny amounts for darker colors. Gel-paste coloring can be intense, so add it gradually.
    3. Wrap each ball of dough in its own sheet of plastic wrap; pat flat into a rectangle. Refrigerate at least one hour or until ready to use.
    4. Parchment or waxed paper makes a good work surface. Sprinkle generously with flour, then roll out each piece of dough 1/4 to 1/2 inch thick to make the swirls; you can use thicker layers for the bull's-eyes.
    5. The bench scraper is a good tool for trimming dough's edges to make them even. The egg white, brushed on with a pastry brush, will act as a glue, making the layers stick together.
    6. For center, with your hands, roll chocolate dough into a 1/2- to 1 1/2- inch-thick rod; chill 20 minutes. Place rod on edge of rolled-out dough that's been brushed with egg white.
    7. Roll rod inside sheet of dough. Cut the dough where it meets up. Seal by pinching and pressing gently. Chill 20 minutes, then repeat to add other layers. To decorate, go to step 7, or jump to step 8 for plain.
    8. For spirals, measure and trim two or more colors of dough to same size. Brush on egg white, then stack layers. Brush top with egg white. Starting at one end, roll up the dough.
    9. Smooth and straighten the layers as you roll them so there are no gaps, then gently pinch and press the edge of the roll to seal it. Now the dough is ready to decorate. If you want plain cookies, skip to step 18.
    10. Add your favorite toppings (try coconut, colored sanding sugar, chopped nuts, or chocolate sprinkles): Spread topping in baking sheet, brush dough with egg white, and roll the log in topping.
    11. Roll each log in parchment or waxed paper; twist the ends of the paper closed. To help the logs keep their round shape, set each in a cardboard paper-towel roll that you have sliced open lengthwise.
    12. To remember what colors you have already used, with crayons, draw the designs onto key tags; tie the tags onto the paper covering the logs. Chill logs until they are solid, about 1 1/2 hours.
    13. Cut 15 inches of dental floss (or double thickness of thread). Let log soften for about 10 minutes. Remove parchment. Wrap floss around log and pull through. Make the slices thin: 1/4 inch or less.
    14. Preheat oven to 350 degrees. Place slices on an ungreased baking sheet (lined with parchment paper). A grown-up should bake the cookies 12 to 15 minutes, until firm but not browned. Let cool on baking sheet for several minutes, then transfer to a wire rack.
****
{End Results}
Baking Difficulty: 2/5
Ingredient Accessibility: 5/5
Tastiness: 2/5
Attractiveness: 3/5
Is it worth it?: Nah

{Pairings}
Drink: Margarita
Activity: Celebrating my return with listening to the above song

Tuesday, October 1, 2013

Hello? (Hello? Hello?)


Is this thing on?

GUESS WHO BAKED SOME COOKIES--THIS ASSHOLE!

Post coming soon.  

Saturday, September 24, 2011


AWwoowowooowWWWOOOowowoOOOooooOOOOOOOO!!!!!!

GHOST OF A LONG DEAD BLOG COMIN' BACK TO HAUNT YOU!!!!! I SHALL RETURN!!!!!

AND I DIDN'T EVEN REALIZE, IT IS EXACTLY SIX MONTHS TO THE DAY SINCE MY LAST POST! SPOOOOOOOOOKY!!!!!!!!

Thursday, March 24, 2011

[Cookie 102] Raisin Bars

DSC_0120

I hate blogging. I like baking, I like baking all these cookies, I like sharing them, I like you readers (most of you), and I like taking pictures, but I don't like updating this thing. I mean seriously, does anyone actually like to do that? Okay, I guess a lot of people.

Forgive me. And you will, once you make these Raisin Bars.

DSC_0094
DSC_0104
DSC_0105

Some notes: The filling is really rad, but would be even radder if you used figs or prunes. Or a combination. Remember these fig bars? They had the most amazing filling, with red wine, honey, and (duh) figs. That would taste pretty damn good in this oatmeal crust. Probz better than the fig bar pastry crust, which was mediocre.

DSC_0112

Hope you are having a nice spring! More posts, more often, I promise. I make no promise on the quality or attitude of them.

P.S. Just read over some old posts. Not sure if I should feel hideously embarrassed about this whole blog and my writing, or proud of my sharp tongue and slick wit. I'm going to go with the former.

DSC_0117

Raisin Bars
Makes 16 wimpy, or 9 fatty squares

Ingredients

  • Unsalted butter, softened, for baking sheet
  • 2 cups raisins (about 13 ounces)
  • 1 cup sugar
  • 1 teaspoon cornstarch
  • 1/2 cup apple cider
  • 2 1/2 cups all-purpose flour
  • 1 1/4 teaspoons baking soda
  • 1 1/4 teaspoons coarse salt
  • 1 1/4 cups vegetable shortening
  • 1 1/4 cups packed light-brown sugar
  • 1 large egg
  • 1 1/4 teaspoons pure vanilla extract
  • 2 1/2 cups old-fashioned rolled oats

Directions

  1. Preheat oven to 350 degrees. Butter a 10-by-15-inch rimmed baking sheet. Line bottom with parchment paper, and butter parchment; set sheet aside.

  2. Make filling: Pulse raisins and sugar in a food processor until almost pureed. Transfer to a saucepan. Whisk cornstarch into 1 cup cold water; whisk into raisin mixture. Stir in cider. Simmer over medium-low heat, stirring occasionally, until mixture thickens and sugar has dissolved, about 6 minutes.
    Let cool completely.

  3. Make dough: Whisk together flour, baking soda, and salt in a medium bowl; set aside. Put shortening in the bowl of an electric mixer fitted with the paddle attachment. Mix on medium speed until smooth. Add brown sugar, and mix until pale and fluffy, 2 to 3 minutes. Add egg and vanilla, and mix until combined. Reduce speed to low. Add flour mixture; mix until just combined. Mix in oats.

  4. Press half the dough into prepared baking sheet. Spread raisin filling evenly over top of dough. Crumble remaining dough on top of filling using your fingers, gently pressing down so that topping covers filling. Bake, rotating sheet halfway through, until top is golden brown, about 35 minutes. Let cool completely in sheet on a wire rack. Cut into 2-inch
    squares. Bars can be stored between layers of parchment in airtight containers at room temperature up to 5 days.


****
{End Results}
Baking Difficultly: 3/5
Ingredient Accessibility: 4/5
Tastiness: 4/5
Attractiveness: 2.5/5
Is it worth it?: Yeah bro

{Pairings}
Drink: Apple cider
Song: Friday -- Rebecca Black (no link, I'm not that mean--just trying to keep up with pop culture here!)
Activity: Write my blog 4 me cuz i am lazee

Sunday, March 6, 2011

[Cookie 101] Cream Cheese Swirl Blondies

DSC_0059

So, I don't know if anyone noticed or cared, but I'm not doing the roundup of the past 10 recipes and reviewing them all. I barely have enough time (read: I barely have enough willpower) to write the regular blog posts here, so I'm getting rid of the excess baggage. I don't think I'm letting anyone down. Right? Yeah, I doubt anyone even knows what I'm talking about. Good.

DSC_0045
DSC_0050

Aaaanyways, let's get on to the first cookie of the new centennial! Cream Cheese Swirl Blondies are probably not one of the recipes you've been itching to make. Me neither--they definitely weren't one of the recipes I've had my eye on for a while. They just sort of slipped under my radar and I always figured I'd make them some time, just not now. Well, I finally made them on a whim one afternoon, and they totally warranted my indifference. They were bland, boring looking, and pretty drab. I mean seriously--look at them! Totally lame.

DSC_0038
DSC_0042
DSC_0043

I guess this is the part where I generally try to convince you to make these cookies because they are actually better than they look or something, but I'm not going to try and deceive you. If you want blondies, make these (even though I screwed up that recipe royally, I think that they are probably supposed to be delicious). But these guys, these guys here...they taste more like a quick bread, like banana bread without the bananas. And who would want that? Nobody! And the cream cheese? Well, at least they had that, but it wasn't enough to keep me interested.

DSC_0032
DSC_0036

Now, maybe you're not convinced not to make these, and you still want to. Well, maybe you could spice them up a bit--literally, add a little nutmeg or cinnamon. Or maybe stir in some chocolate swirls, or even add some nuts. Something. Anything. Oh, or try adding a streusel topping! That always makes things better.

DSC_0034

Well, I guess I don't have much to say other than that. The recipe is super simple and it's always mildly entertaining getting to swirl two batters together like this. But other than that, I'd pass this guy up.

DSC_0031

I'm starting to realize that all the recipes I have left to bake are either: A) Totally time consuming and tedious; B) Way too fatty to make just for 3 people; C) Or both. Hm. Well, my obsessive-compulsive desire to finish the project still prevails, so I guess you'll see how this all turns out.

c u l8r

DSC_0064
DSC_0062

Cream Cheese Swirl Blondies
Makes 9 large or 16 small squares

Ingredients

  • 11 tablespoons (1 stick plus 3 tablespoons) unsalted butter, room temperature, plus more for pan
  • 1 2/3 cups plus 2 tablespoons all-purpose flour
  • 1 teaspoon baking powder
  • 3/4 teaspoon salt
  • 1 cup packed light-brown sugar
  • 3 large eggs
  • 1 1/2 teaspoons pure vanilla extract
  • 6 ounces cream cheese, room temperature
  • 1/4 cup sugar

  • Directions

  • Preheat oven to 325 degrees. Line a buttered 8-inch square baking pan with parchment, allowing a 2-inch overhang. Butter lining (excluding overhang); set pan aside.
  • Whisk together 1 2/3 cups flour, the baking powder, and salt in a medium bowl, and set aside.
  • Put 9 tablespoons butter and the brown sugar in the bowl of an electric mixer fitted with the paddle attachment; mix on medium speed until pale and fluffy, about 3 minutes. Add 2 eggs and 1 teaspoon vanilla; mix until combined. Reduce speed to low. Add flour mixture, mix, scraping down sides of bowl, until well combined. Transfer to a large bowl.
  • Put cream cheese, granulated sugar, remaining 2 tablespoons butter, 2 tablespoons flour, 1 egg, and 1/2 teaspoon vanilla into the clean bowl of an electric mixer fitted with the paddle attachment; beat on medium speed until just smooth.
  • Pour half the blondie batter into prepared pan, and spread evenly with an offset spatula. Spoon two-thirds of cream-cheese mixture on top, and spread evenly. Drop dollops of remaining batter on top (spacing about 1 inch apart), and spread. Top with dollops of remaining cream-cheese mixture, about 1 inch apart.
  • Gently swirl cream cheese mixture into batter with a butter knife, running the knife lengthwise and crosswise through layers. Bake until golden brown and a cake tester inserted into center comes out with a few crumbs but is not wet, 45 to 47 minutes. Let cool completely on a wire rack before cutting into squares. Blondies can be stored between layers of parchment in an airtight container at room temperature up to 2 days.

  • ****
    {End Results}
    Baking Difficultly: 2/5
    Ingredient Accessibility: 4/5
    Tastiness: 2/5
    Attractiveness: 2/5
    Is it worth it?: To put it plainly, no. But then again, they require zero effort.

    {Pairings}
    Drink: Nothing. Seltzer?
    Song: Saw the Smith Westerns play last night, and now I am even more in love with them than before. Their single Weekend is adorable x 100000 and has a great music video.
    Activity: Skip making these, and just listen to them ^